1E Identifying the Parts
The illustrations on the following pages show the Printer from various angles so all important parts can be identified.
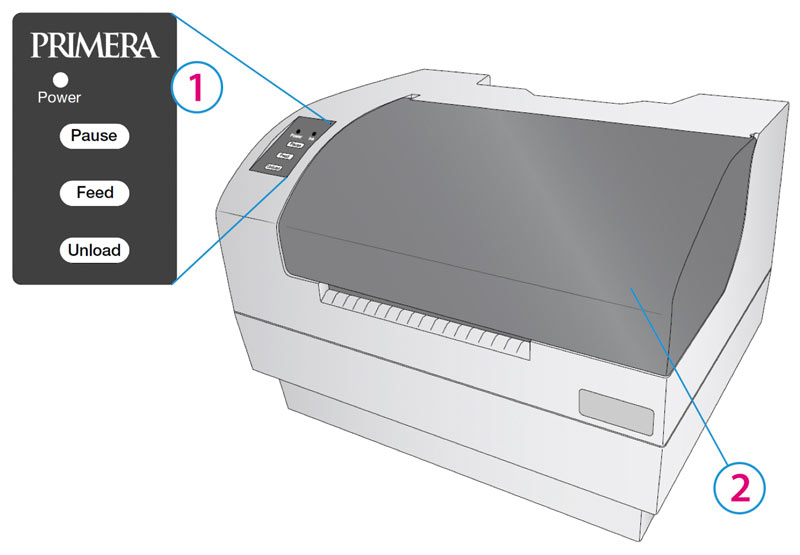
1Control Panel
2Front Cover
The Power LED indicates that the Printer is on and ready to receive print jobs.
The Pause Button is pressed to pause a job to allow for loading of label stock and ink cartridges. The Printer pauses after the printing of the current label has finished.
The Feed Button is pressed in order to load label stock if the Printer does not automatically detect the stock. When stock is loaded each press of the button will cause one label or a few inches to be fed through the Printer.
The Unload Button is pressed to unload label stock after you receive an End of Roll message in PrintHub. The Printer will reverse the label stock through the feed area.
Interior
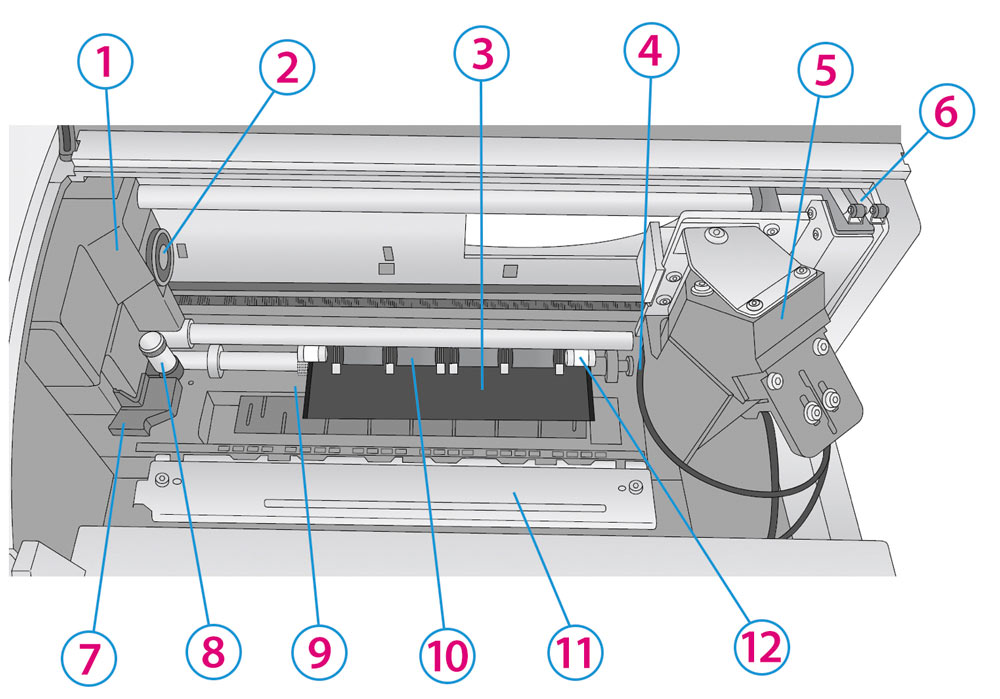
1Die Cutting Carriage
2Electromagnet
3Laser Media
4Fiber optic wire
5Laser Print head
6Dual Safety Interlock
7Knife Collar Handle
8Die Cutting Knife
9Wear Strip
10Pre die-cut rollers
11Output Cutter Wheel Mechanism
12Die Cutting Pinch Rollers
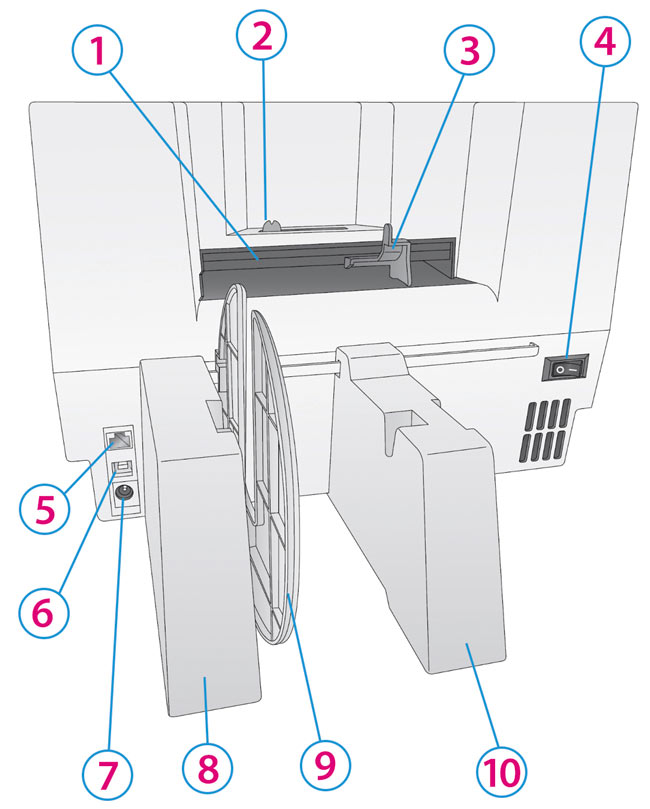
Back
1Infeed Area
2Gap Sensor Adjustment
3Movable Throat Guide
4Power Switch
5Ethernet
6USB
7Power
8Fixed Roller Holder w/ Chip Reader
9Fixed Guide
10Movable Roll Holder