Section 2: Loading the Label Stock
- Remove the Roll Bar and Roll Guides from the Label Applicator. The Roll Guides and Roll Drag Arm are removable and adjustable. They are held in place magnetically. (Figure 2-1.)
- Remove one Roll Guide and the Roll Drag Arm from the Roll Bar.
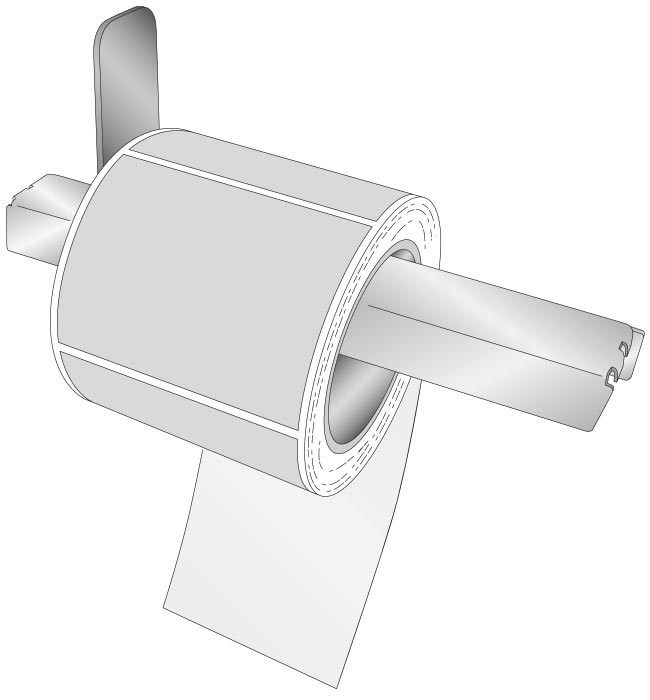
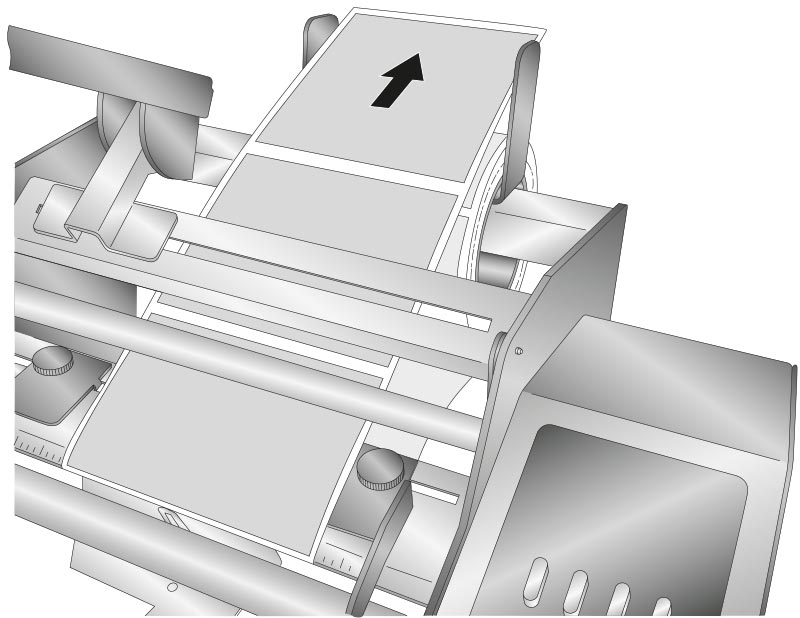
- Place the label stock roll on the Roll Bar with one side against the upright of the remaining roll guide. Place it on the Roll Bar with the loose end of the stock feeding underneath the roll. (Figure 2-2.)
- Place the Roll Drag Arm under the Roll Bar. The Roll Drag Arm may be placed on either side of the Roll Bar but the rounded tip of the Roll Drag Arm should be located in the center of the inside of the core. The arm is spring loaded so that there is downward pressure on the inside of the roll. This helps prevent application alignment problems near the end of a roll. (Figure 2-3.)
- Place the removed Roll Guide back on the Roll Bar and slide it close to, but not touching the label stock roll. (Figure 2-4.)
- Now position the stock to correspond with the general area where it will be applied to the container.
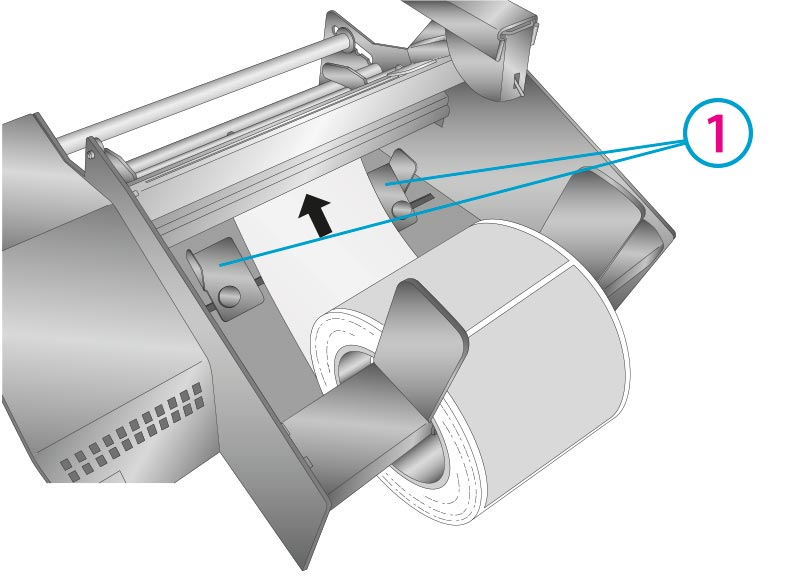
- Pull the loose end of the label stock forward and then push it into the Feed Area from the back of the printer. The labels will come out just underneath the Peel Edge. (Figure 2-5.)
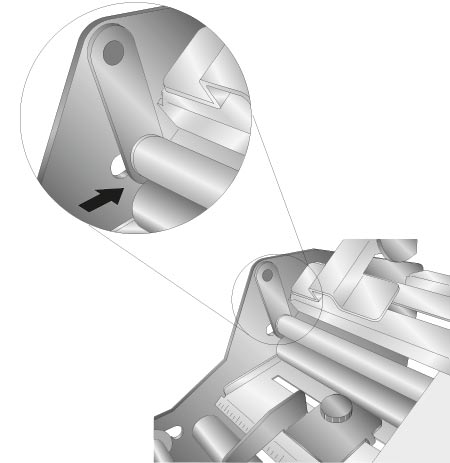
- Pull approximately 12 inches of label stock out beyond the Peel Edge. (Figure 2-6.)
- Take the loose label stock and feed it between the Liner Idler Roller and the Liner Drive Roller. (Figure 2-7.) In order to feed the label stock between the rollers, the Liner Idler Roller should be in the unclamped position. For some thicker label stock, it may be necessary to remove the labels from the liner before performing this step. (See Figure 2-10 for a detailed diagram of the Liner Idler Roller positions.)
- Pull the stock all the way through until the end of the roll is laying over the top of the label stock roll. Adjust the label stock forward or backward so that the Peel Edge is between two labels. (Figure 2-8.)
- If necessary, adjust the position of the liner on the Peel Edge left/right to align the liner with the label stock roll. Also, adjust the Label Sensor using the Label Sensor Bracket so that the Label Sensor Flag is roughly centered on the label stock. (Figure 2-9.)
- Push the Liner Idler Roller into the clamped position. (Figure 2-10.) Figure 2-10.
- The labels are now ready for application.
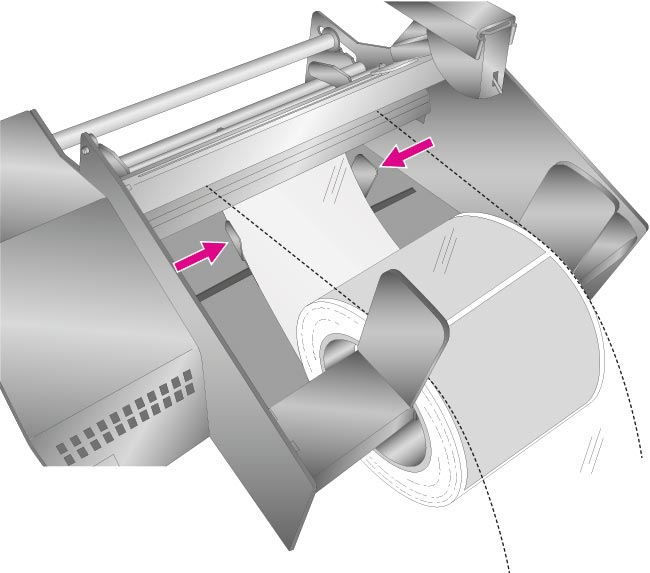
- Adjust the label guides so that they are just touching the edge of the label stock. Do not pinch the labels between the guides. If the guides are loose pull them away from the label stock and tighten the thumbscrews. When the thumbscrews are tight, you can still move the guides.
Figure 2-1.
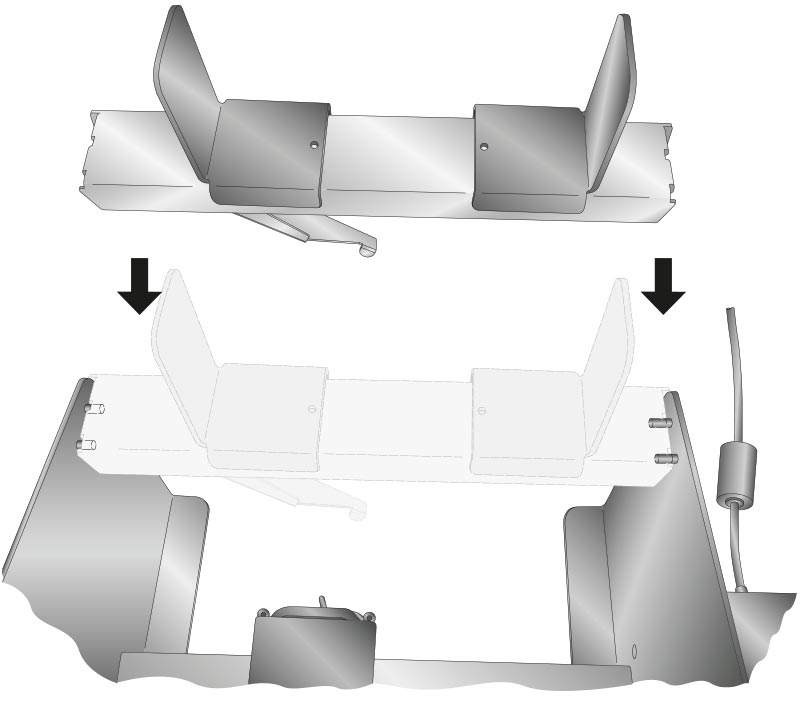
Figure 2-2.
Tip! For smaller diameter label roll cores you may need to reverse the Roll Guides so that the bottom of the guides are facing out to allow the uprights to be placed next to the roll.
Figure 2-3.
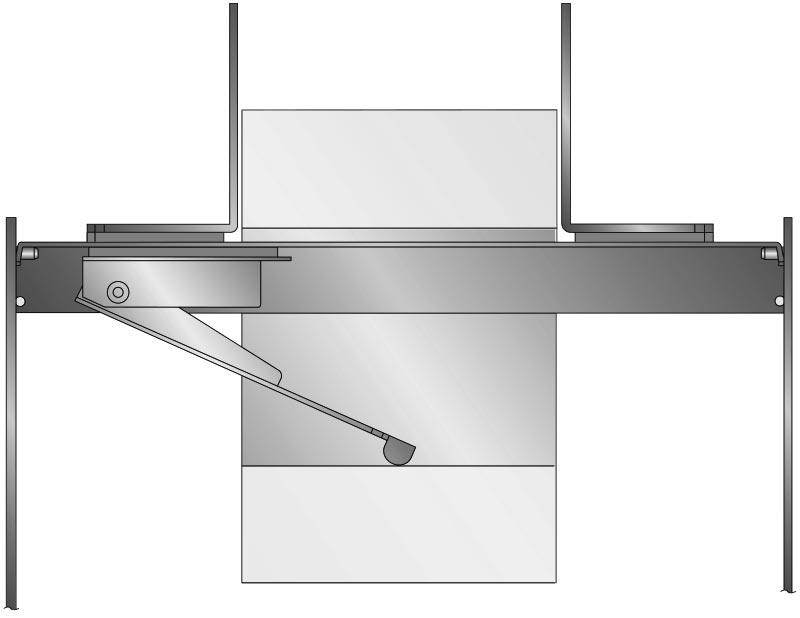
Figure 2-4.

Tip! Roll Guide Uprights must not pinch the label stock roll. (The label stock roll must have free-play between guides.)
Figure 2-5.
Tip! See Section 5 for a Label Path diagram.
1Label Guides
Figure 2-6.
2Peel Edge
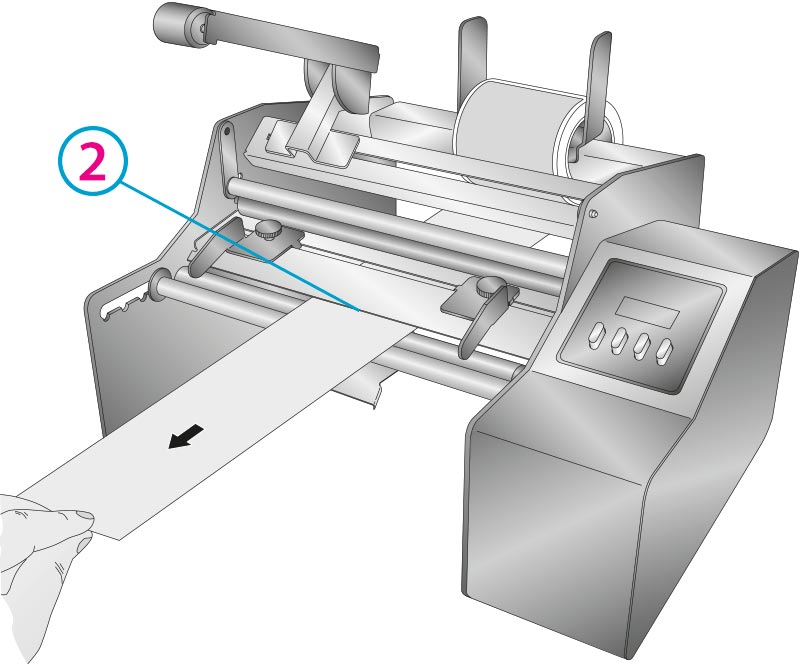
Figure 2-7.

Note: This procedure assumes that the first 12 inches of labels will not be applied to the container using the Label Applicator. Of course, you may still apply these labels by hand.
Figure 2-8.
Tip! There must be no labels wrapped around the Peel Edge.
Figure 2-9.
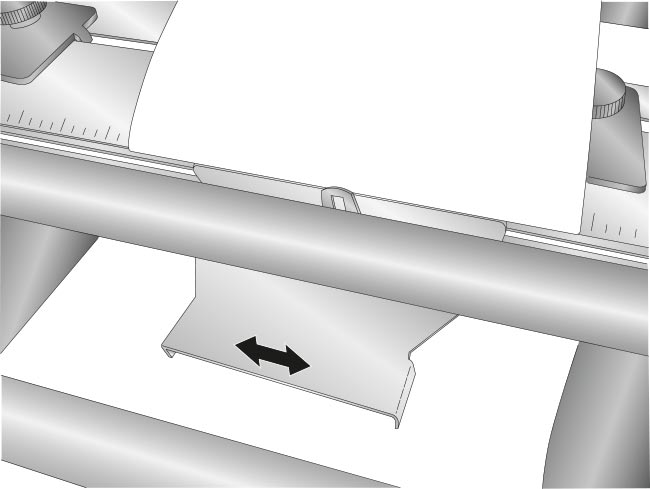
Figure 2-10.
Clamped Position
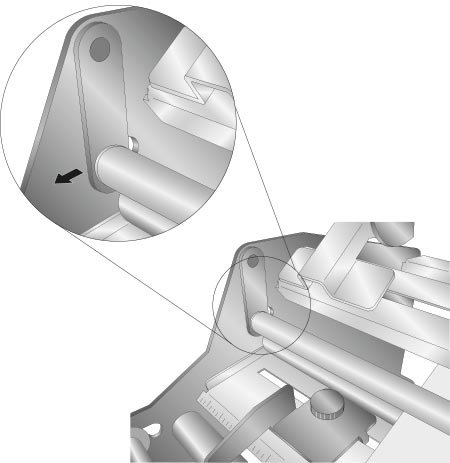
Unclamped Position
Note: Position the Label Applicator on the edge of a table so that the liner falls to the floor. This will prevent excess labels from interfering with label applications.
Figure 2-11.
*Thumbscrews
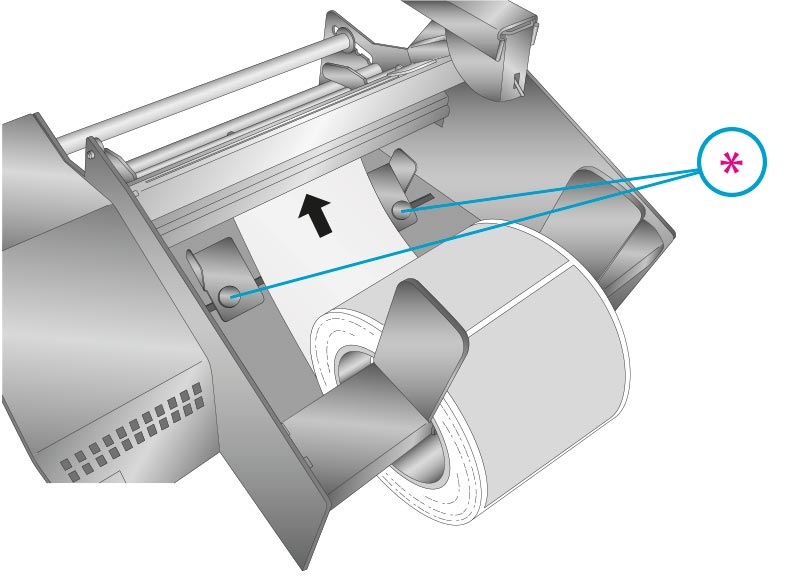
Figure 2-12.
Note: Guides can be removed and swapped to accommodate narrower labels. To accomplish this it is only necessary to remove one of the guides. See section 6 for instructions.