3D Adjusting Print Alignment
If your previous experience with printing is limited to printing letters and cards to 8.5 inch by 11 inch paper you probably are not familiar with an essential part of a label printing - Print Alignment. Standard printers feed a sheet and start printing based on the start of the sheet. They also prohibit printing to the edge of the sheet. This is to avoid any need for alignment.
The LX600 senses the beginning of the label with an optical sensor and is capable of printing to top, bot- tom, left and right edge. Because of this it is necessary to align the printer to work with specific types of label stock.
The LX600 comes factory calibrated to print exactly to the edge of Primera label stock. However, due to var- iations in the left margins and other variables it may be necessary to fine tune these settings at the begin- ning of each roll. This is especially true for other non-Primera brand label stock.
Adjust print alignment using the PrintHub. Go to the Print Alignment Tab (second tab).
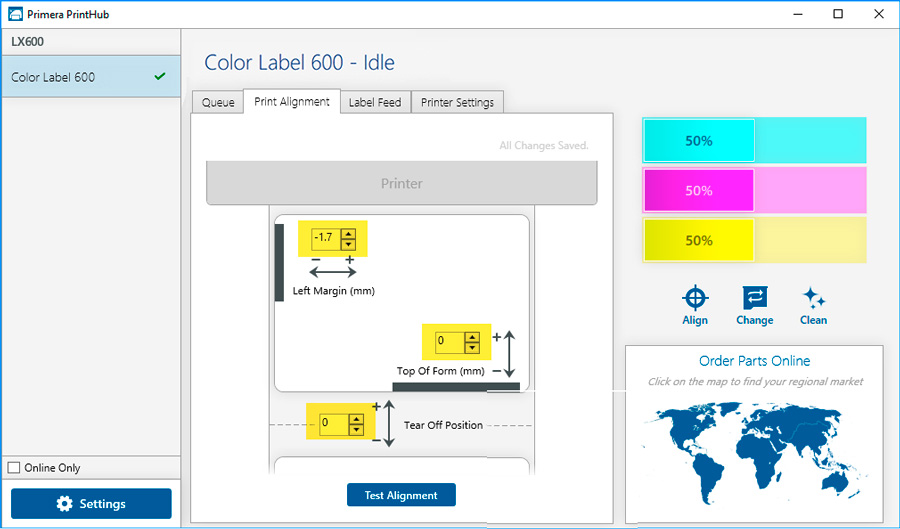
Click on Test Alignment to print the alignment shown to the right. Look at the print to determine how much white space is visible on the edges. The black lines should print right on the leading edge and left edge.
In this example the Top of Form needs approximately - 10.
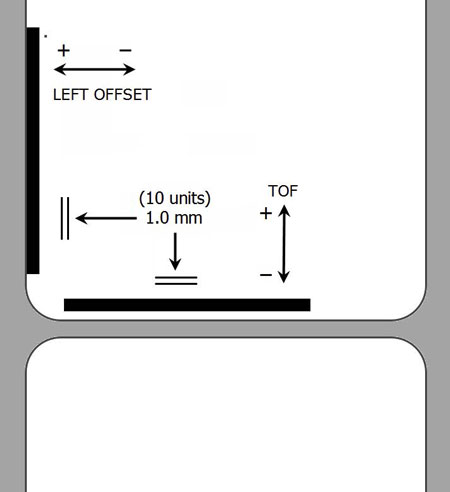
1Adjust Top of Form -10
1. Left Margin Offset. This value moves the printed label left or right. Add to the current value to move the printed label to the right. Subtract from the current value to move the printed label to the left.
2. Top of Form (TOF). This value moves the print start position up or down on the label. Add to the current value to move the printed label down or toward the printer. Subtract from the current value to move the printed label up or away from the printer. The value is automatically saved as soon as you set it. You may have to make several adjustments to one or more of these values. After each adjustment you can click the Test Alignment button to print a small test pattern on the label. This will help you find the proper alignment value.
3. Tear off/Cut Position. This value adjusts the position of the last label printed after it has been presented. This only applies if the output mode is set to “Present the label.” Add to the current value to move the tear point closer to the printer. Subtract from the current value to move the tear point away from the printer. The value is automatically saved as soon as you set it.