2B Installing Pre Die-Cut Label Stock
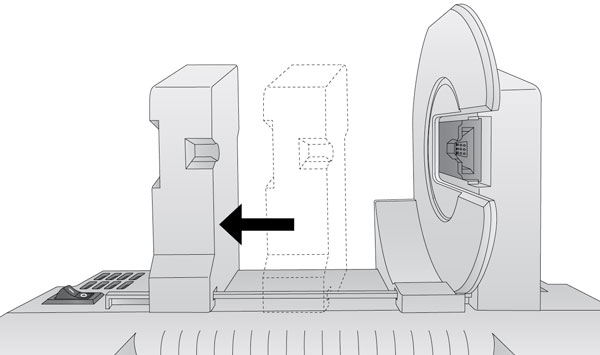
1. Move the roll holder to the approximate position which matches the width of the stock you are installing. You can always fine tune this later.
2. Install the Green Hub on the right side of the pre die-cut media.
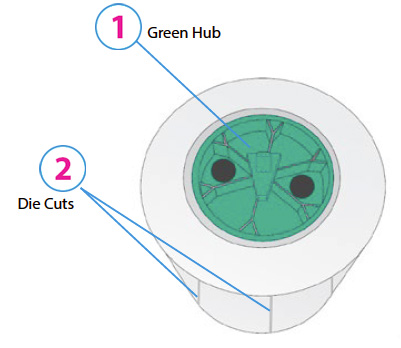
1Green Hub
2Die Cuts
3. Install the Blue Hub on the left side of the digital die cutting media.
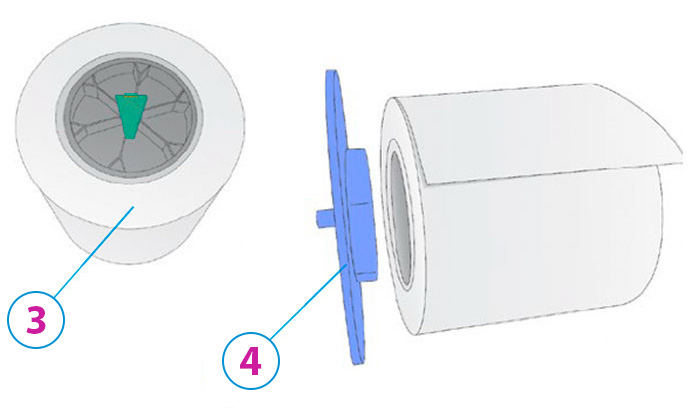
Note: The green hub is not needed for digital die-cutting and can be stored in the notch on the movable holder.
3Green Hub
4Blue Hub
4. Set the roll in place so that the blue pin sits in the notch on the roll holder.
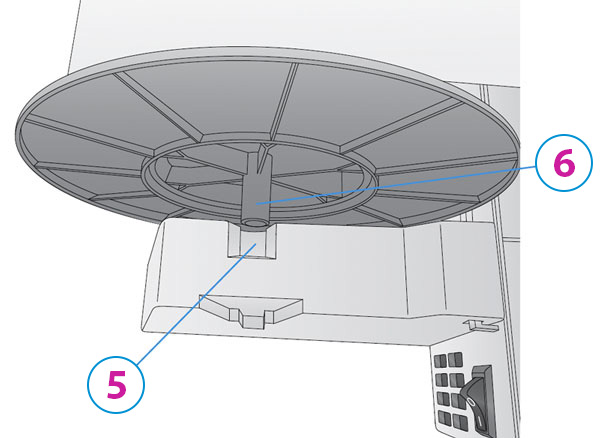
5Notch
6Blue Pin
5. Make sure the green blank chip holder fits in the corresponding green slot on the roll holder.
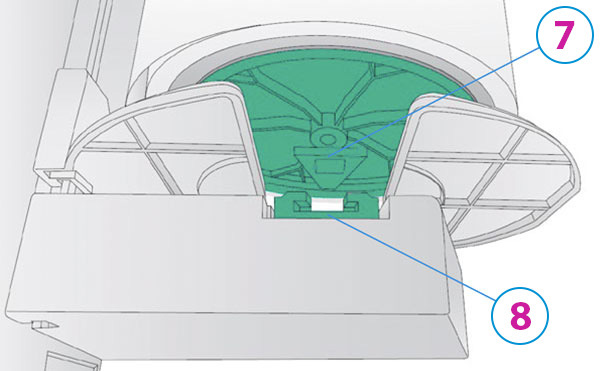
7Green Chip Holder
8Notch
6. Before feeding the stock you must plug in power and switch on the printer.
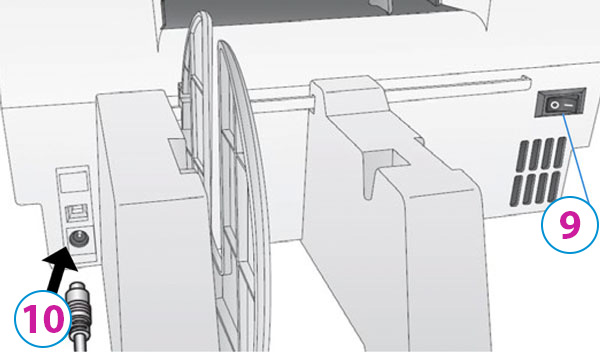
9Power Switch
10Power Cable
7. Guide the leading edge of the roll into the feed area. Move the blue guide so that it touches the label stock.
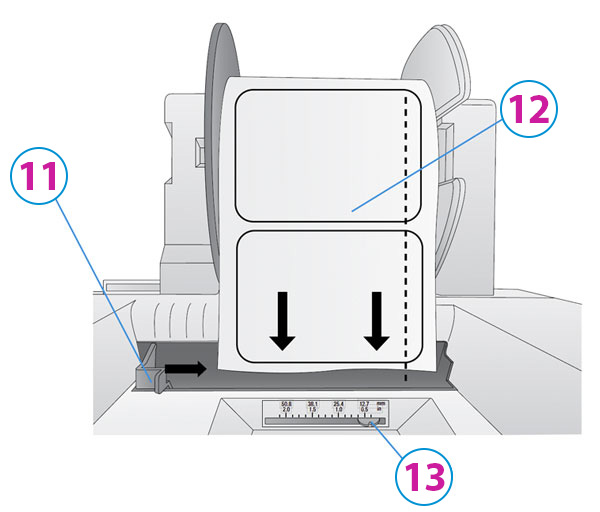
11Blue Guide
12Gap sensor should intersect the gap between labels
13Gap Sensor Position Indicator from right edge of media
Note: the positon of the label sensor. Slide the sensor position indicator so that it intersects with the gaps between your labels. For most label stock you will not need to move this.
8. Push until the printer detects the stock, grabs it and pulls it through the printer.