Section 4: Applying the Label
A. Apply the label
- Power on the Label Applicator using the Power Switch. This can be done at any point with or without the container in place.
- Place the container on the rollers using the instructions in Section 3. Important Note: For label stock 6” and wider, it may be necessary to reduce the speed of the Label Applicator. The AP360e/362e includes a half-speed mode that generates more power from the motors for wider label stock. To activate this mode, hold down the Foot Switch while switching on the unit. The AP360e/362e will revert back to the default mode when switched on without holding down the Foot Switch.
- Press the Foot Switch to apply the label.
- Remove the container. The rollers will continue to spin the container for fifteen minutes after each application. If you need to make an adjustment, do so now.
- While the rollers are still spinning, place the next container on the rollers and press the Foot Switch.
- Continue this process until all containers are labeled.
B. Apply two labels to the same container (AP362e only)
The AP362e has the ability to apply two labels to the same container. Using the control panel you may also adjust the distance between the two labels. Nine different distances can be saved in the unit’s memory. These distances are represented by nine different memory locations: F1 - F9. (F-0 represents the single label application mode.) By choosing the desired memory location/distance you can easily switch between multiple two-label containers without having to readjust label distances.
Follow this procedure to apply two labels to each container:
- Press the Mode Button once to display the current memory location.
- While in the memory mode, press the Recall/Reset button repeatedly to move to the desired memory location (F1 - F9). (Press Recall/Reset repeatedly to move back to F0 for single-label mode.) (Figure 4-1.)
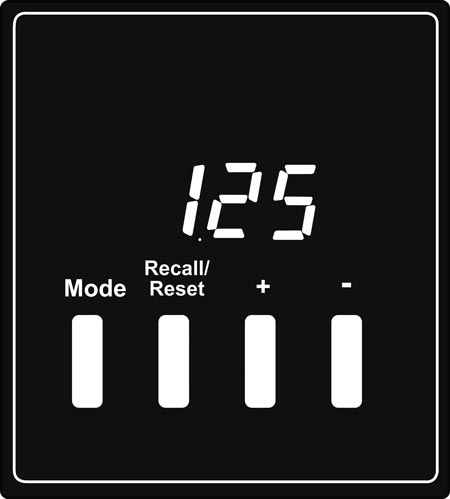
- The desired memory location (F1 - F9) will be displayed for 2 seconds, followed by the current value set for that memory location for another 8 seconds. During this time, press the + or - button to adjust the distance value to be set for this memory location. (Figure 4-2.)
- Press the Foot Switch to apply the labels. Both labels will be applied without pressing the Foot Switch again.
Hold down the button to move more quickly through the values. Once the value is set it will be displayed for 8 seconds and then stored in memory. The screen will then revert to label counter mode. The value displayed corresponds to inches. The unit accepts values between 0.01 and 9.99 inches (0.25 mm to 253.7 mm).
For metric versions of the AP362e the value displayed corresponds to centimeters. The unit accepts values between 00.1 cm (1 mm) and 25.4 cm.
To set a value for another memory location, repeat this procedure.
Note: The distance values are approximate. Adjusting the position of the Container Idler Roller will affect the actual distance between the labels on the container.
Figure 4-1.
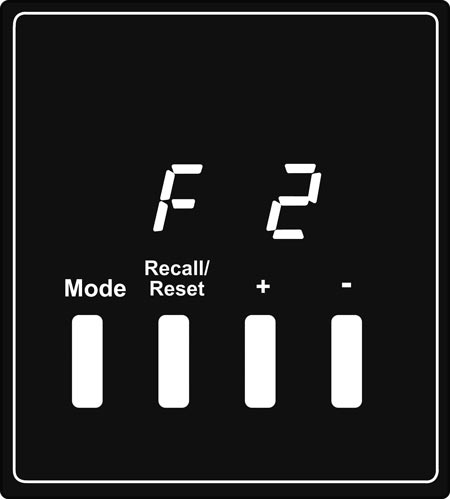
Figure 4-2.
C. Calculate distances for two-label mode
If you intend to apply two labels to the same container you will typically want to center the second label so that you have the same distance between each label on both sides. Use this formula to calculate the proper distance setting (see Section 4B).
- First Calculate the circumference of your container. diameter of container x Pi = circumference
- Now subtract the width of both front and back labels from the circumference and divide by two. (circumference - width of front label - width of back label) / 2
- Subtract the distance between the labels on the liner (the distance between the labels while they are still attached to the roll) from the value received in step 2.
Example:
If your bottle is 3 inches in diameter, your front label is 4 inches wide, your back label is 2.5 inches wide, and the distance between the labels on the liner is .12, the distance value to enter would be 1.34 inches.
3 x π = 9.42
(9.42 - 4 - 2.5)/2 = 1.46 - 0.12 = 1.34
Note: The value given by this formula is a good starting point. Some adjustments may be needed depending on the particular container and the Container Idler Roller position.
D. Count labels (AP362e Only)
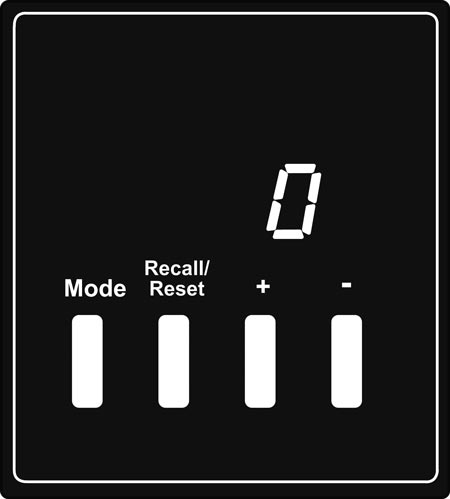
By default the AP362e Label Applicator will begin to count labels. This count will be displayed on the LCD. If you press any of the buttons on the control panel the label count will momentarily disappear. It will reappear ten seconds after the button is pressed. (Figure 4.3.)
Press and hold the Recall/Reset Button for five seconds to reset the label counter to zero.
Note: The label counter will reset to zero if power is switched off.
Figure 4-3.
E. Change the unit of measure between metric and English
The AP362e can display measurements in both centimeters and inches. Follow these steps to switch between the two.
English (Inches):
- Turn off the unit.
- Press and hold both the "Mode" button and the "+" button while you switch on the unit.
- While the unit is booting up a "-" will appear as the first digit of the firmware version number on the display.
Metric (Centimeters):
- Turn off the unit.
- Press and hold both the "Mode" button and the "-" button while you switch on the unit.
- While the unit is booting up a "
 " will appear as the first digit of the firmware version number on the display.
F. Set the mode of container roller motor:
By default the container rollers continue to spin after every application. This is done to increase application speeds. However, using this method it is not possible to apply the label at a specific point on the container. To do this you can put the unit in Stop After Apply mode.
Run After Apply (Default):
- Turn off the unit.
- Press and hold the Recall button with the ‘+’ key and turn on the unit.
Stop After Apply:
- Turn off the unit.
- Press and hold the Recall button with the ‘-’ key and turn on the unit.