Section 4: Printing and Cutting with PTCreate
PTCreate is everything you will need to layout your prints and cuts for your LX610. Every object that you place in your layout, can be set to print only, cut only or Print and Cut. There are two different versions. The Standard version comes with the printer. The Professional version can be purchased. After a 30-day trial the Professional version requires an activation code. During the trial you can use the program but you are not able to save files or send cut files to the printer.
Mac Note: Only the Pro version is available for Mac users. The following screen captures are from the PC software. However, all Pro version features are the same on Mac and PC. Locations and functions are the same on Mac and PC.
4A Overview

1. Layers. (not in Standard Version) Layers allows you to see and manipulate layers of imported SVG files or elements added within PTCreate. SVG files can be created in programs like Adobe Illustrator.
2. Import and Trace. Import allows you to flat files and vector files (not in Standard Version) which can be a graphic you would like to print, a cut file or both in the same file. Trace allows you to create a cut file be tracing a JPG, BMP or TIF or other flat file that you have imported. This is a great option for creating complex cut files without needing another expensive and complex design program.
3. Advanced Design Tools. (not in Standard Version) Advanced design tools such as Gradient, Eye Dropper, Eraser, Freehand drawing and the Shape Node Tool allow you to create your own design in PTCreate.
4. Document, Position and Size, Fill and Stroke, Style, Text. These tabs all manipulate existing objects on the page. Document controls the artboard or page size. Position and size allow you to precisely move objects on the page. Fill and stroke allows you to change the color of lines. Style allows you to change whether a particular object should be cut, printed or both. Text allows you the change font and size of text objects.
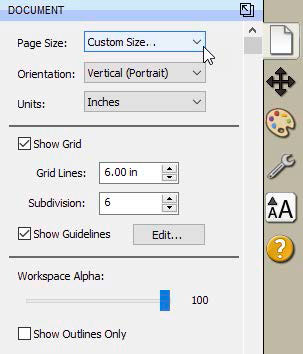
a. Document. Use this tab to adjust the page size after it has already been setup. Sometimes you may need to increase the height the page to accommodate a bleed or multiple rows.
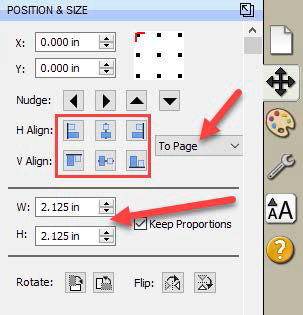
b. Position and Size. You will use this tab to move both the cut line and the image on the page. It is much easier than trying to drag and drop images manually.

c. Fill and Stroke. Use this to change the line style of the cut. For the most part you should leave these settings at their defaults. If you are having trouble seeing your cut line, you can change the color of it here.
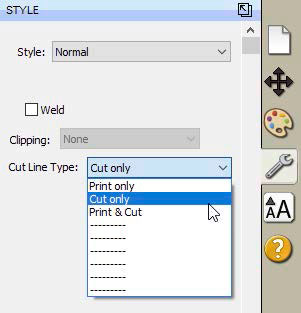
d. Style. Here you can designate whether any object should be Print, Cut or both. By default all images imported using the import icon will be set to Print. Also, all objects drawn using the rectangle or circle tool will be set to Cut. However, this tab will allow you to adjust this if necessary.
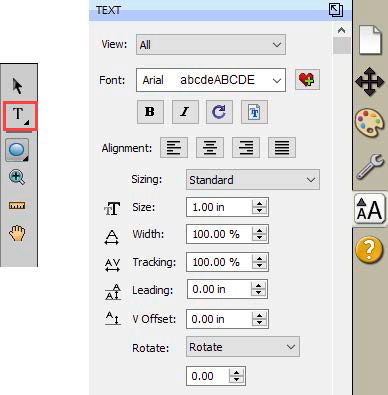
e. Text. The text tab allows you to adjust the font, size and other properties of text. Text can be added using the Text tool from the left side tool bar.
5. Library. The library contains some preset shapes that you can apply to your document as cut objects or print objects.
6. Page Layout. This area shows your actual image. You can move objects here by clicking and dragging. You can also see where the cut will be made in relation to your print. In the example above the cut line is highlighted red and inset (overbled) slightly so there will unprinted area on the label