1C Identifying the Parts
This illustration shows the front of the printer with its control buttons and LED indicator light.
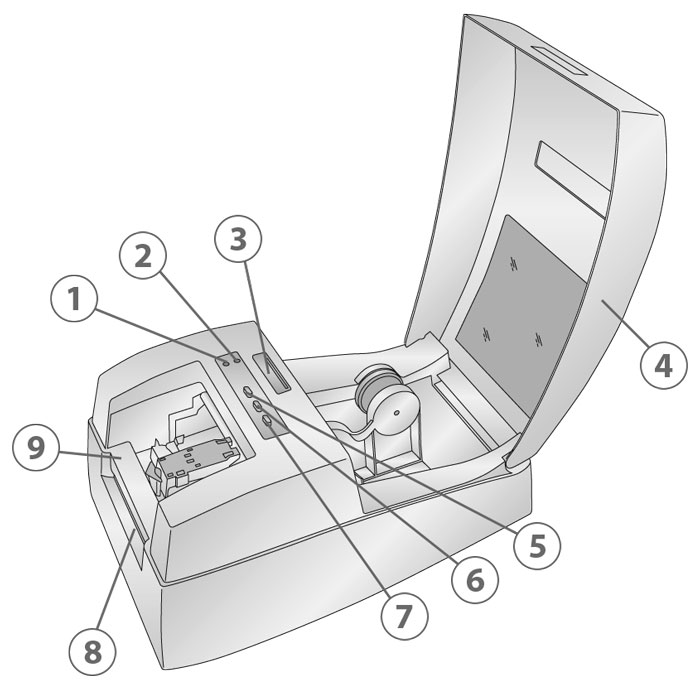
1Ink Low LED
2Power LED
3Label Stock TOF Sensor Bar
4Top Cover
5Ink Button
6Load/Feed Button
7Unload Button
8Label Tear Bar
9RFID encoder (RX500e only)
The Ink Low LED 1will illuminate when a cartridge has 10% or less of its ink remaining.
The Power LED 2indicates that the printer is on and ready to receive print jobs.
The Ink Button 5moves the carriage to the center to allow for loading of the ink cartridge. Once the cartridge is loaded, press the ink button again.
The Load/Feed Button 6is pressed in order to load label stock or form feed the label stock through the printer.
The Unload Button 7will unload the installed label stock by reversing it through the printer. Make sure to tear off the printed labels before pressing the Unload Button.
The Label Tear Bar 8is a serrated edge for conveniently tearing your finished labels from the printer.
This illustration shows the input ports and power switch found on the rear panel of the printer.
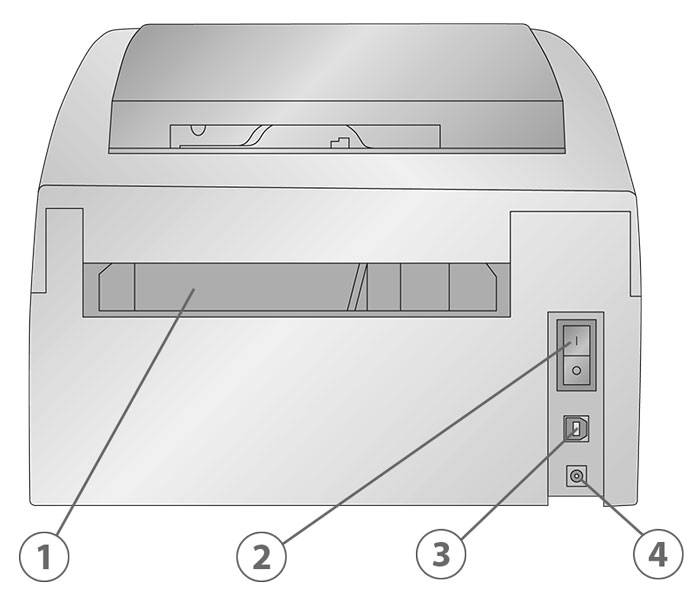
1Fan-fold Label Slot
2Power Switch
3USB Port
4Power Input Port