7C Maintenance
Replacing the Cutter Wear Strip
The wear strip is the surface directly underneath the cutting blade in the cutter mechanism. Over time this strip will wear down due to cutter knife pressure. It can also be damaged if the knife cuts through the liner and contacts the wear strip.
To replace the wear strip remove any media from the cutter mechanism. Power off the Printer.
Push the knife carrier gently to the left. Grab one end of the wear strip and pull it off the cutter. If necessary, use a utility knife to get under the strip to start it. The wear strip is held in place with adhesive so there may be adhesive residue. Clean off the adhesive with isopropyl alcohol. Remove the liner from the new wear strip. Press the strip into place. Make sure it is fully seated in the recessed pocket.
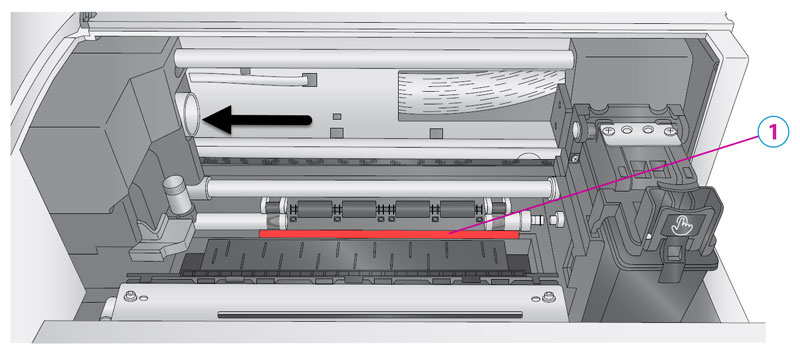
Replacement Wear Strip Part Number 074549 (10 pack)
1Wear Strip Location
(Red Color is only meant to highlight location)
Label Cut Dust
Label cut dust can accumulate at any place along the cut path.
Paper media creates more dust than synthetic material. Dust build up does not cause any specific immediate problems but it can eventually cause problems with the moving parts and electronics in the cutter. Periodically vacuum the cutter area and rollers.
Cleaning the Printer
The case of the printer can be cleaned with an ammonia based window cleaner and a lint-free cloth. Over time, ink overspray may gather at the base of the printer. The printer is designed using a vacuum system to gather most of this ink on a series of saturation pads. Eventually, these pads may need to be replaced. Contact tech support to determine if pad replacement is necessary.
Ink Accumulation - Chutes
Ink build up can occur in the spit chutes that leads to the ink saturation pads. Pigment Ink tends to build up faster than Dye Ink. Make sure there is a clear path for the ink to reach the pads below. Partially dried ink can accumulate around the sides of the chute. Use a ridged flat edge such as a pairing knife to scrap away the ink.
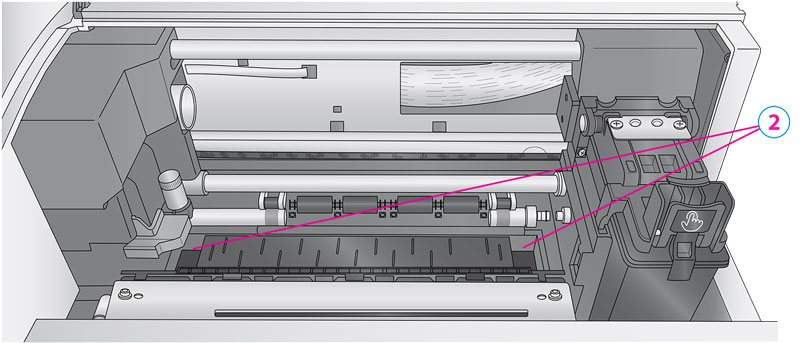
2Ink Chutes
Ink Accumulation – Wipers (A software and firmware update may be required. Run the update first)
If you notice that your print quality is poor at the beginning of a print but gets better as it continues to print, your ink wipers may have accumulated a combination of cut dust and ink. Check the wipers and clean them with rubbing alcohol and a cotton tip cleaner. Wipers are located on the right side of the printer but are normally hidden from view under the cartridge. You will need to put the printer in wiper maintenance mode.
- Open the top cover.
- Press and hold the pause button for 3 seconds until you see the print carriage move.
- You will now have access to clean the wiper.
- When complete close the cover.