7D Cleaning the Output Cutter
Every 2000 cuts you will be prompted to clean the output cross cutter using a cleaning card. If you have the card, you may follow the prompts to complete the cleaning procedure. Otherwise you can purchase a pack of ten cleaning cards at the link below.
Cleaning Card 10 Pack – SKU 074550
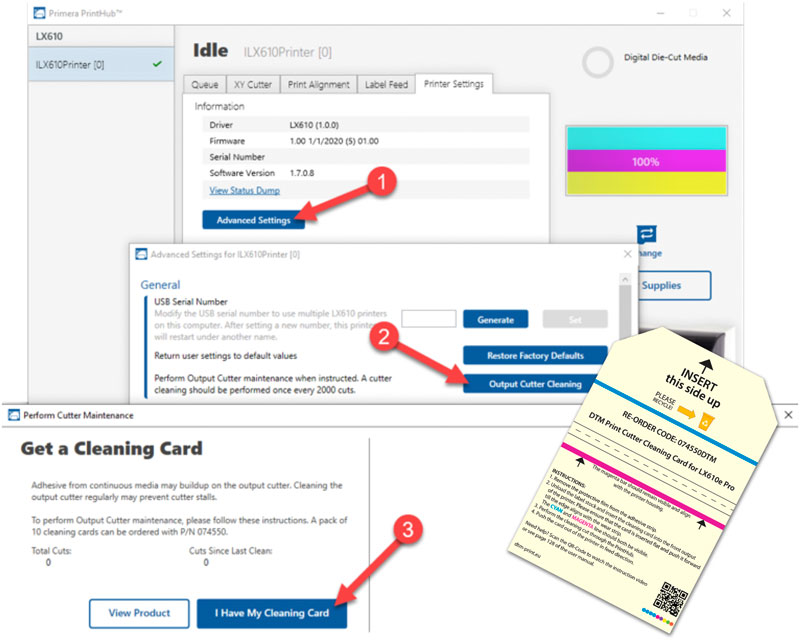
To manually perform a cleaning in PrintHub, go to the Printer Settings tab – Advanced Settings – Output Cutter Cleaning.
Instructions: Cleaning Cards are used to clean the output cutter wheel that cuts between each label or at the end of a group of labels. If the cutting wheel cuts through continuous adhesive backed paper (such as LX610 digital die cutting media), it can accumulate adhesive build-up that will eventually cause cutting problems.
Recommend Cleaning Interval: Every 2000 Labels. PrintHub software tracks this and will alert you when cleaning is necessary.
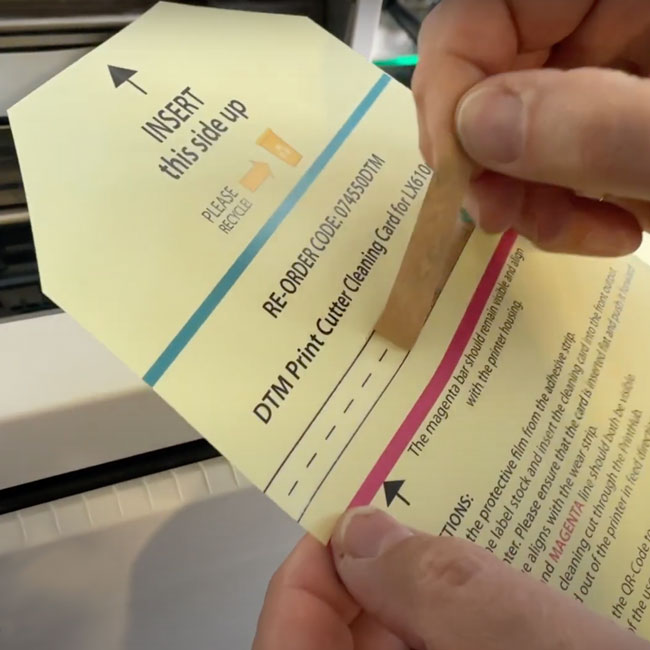
1. Locate the cleaning card.
2. Peel off the protective strip covering the adhesive.
Mac Instructions: The macOS software does not track cutting frequency or provide a cut button. However, you can still use the clean-ing card to clean the cutter. Unload the paper and turn off the printer. Position the card in the same way as described for above but instead of sending the cut command through Print hub, simply turn on the printer. It automatically will do a cut at startup. Now remove the cut part of the card from inside the printer and reload the label stock.
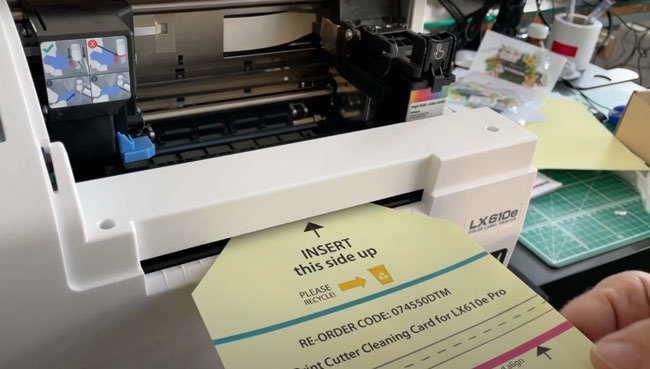
3. Unload label stock from the printer. Insert the cleaning card into the front output of the printer.
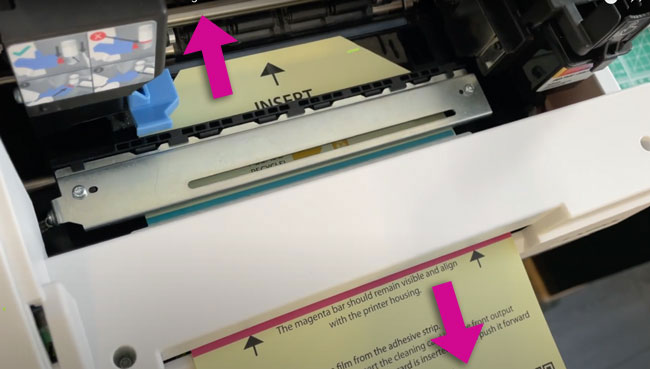
4. When the exposed adhesive strip is aligned with the output cutter path, open PrintHub
– Select Printer Settings – Advanced. Click on Output Cutter Cleaning. Once the cutter cycles, remove both parts of the card from the printer
