2F Replacing Ink Cartridges
You can replace cartridges at any time or wait for the Low Ink Warning to prompt you to replace cartridges. You will receive low ink warnings at 10% and 0%. Press the Load/Feed button to continue printing after you receive this warning.
To change a cartridge, follow this procedure:
- Open the front cover. That cartridge will automatically move to the right side if it is not already there.
- Press or pinch the tab on the front of the cartridge holder.
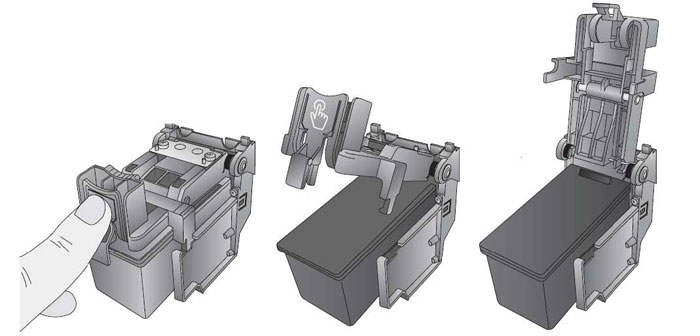
- Remove the cartridge.
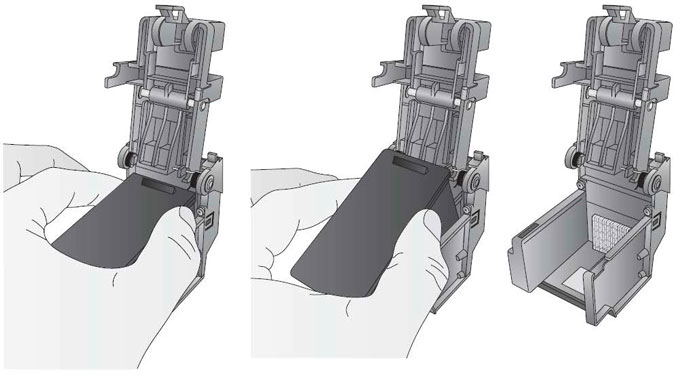
- Locate a new cartridge and remove it from its packaging. Remove the foil outer package and the tape covering the nozzles.
- Place the new cartridge into the empty carriage.
Note: When installing the cartridge, tilt the cartridge at a slight backward angle of approximately 30 degrees.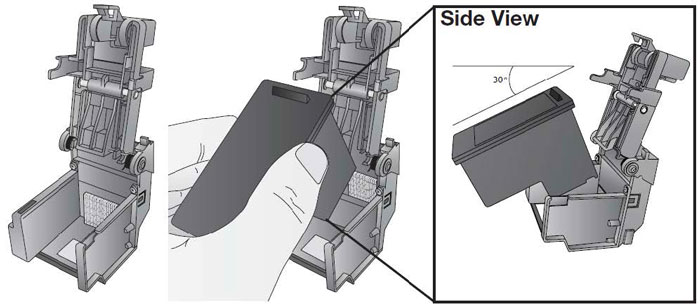
- Make sure the cartridge is pushed back far enough so the ridge on the cartridge is behind the spring-loaded pusher on the lid. Push down on the cartridge. Close the lid on the cartridge by lightly pressing down from the top until you hear a click.
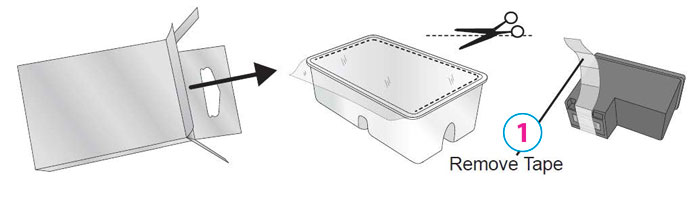
1Remove Tape
2PUSH DOWN
3Click
