3D Set the Present or Cut Mode (Cutter Models Only)
Use the Present/Cut Mode to adjust how the printer presents labels after they are printed or if/when they are cut after printing. To adjust the Present/Cut Mode, open the PrintHub program.
- Connect the printer via USB and turn on the power. The Output/Cut Mode Setting is stored on the printer main board so you will not be able to access it unless the printer is turned on and properly communicating with the computer.
- Go to Start - Programs - Primera Technology - Primera PrintHub.
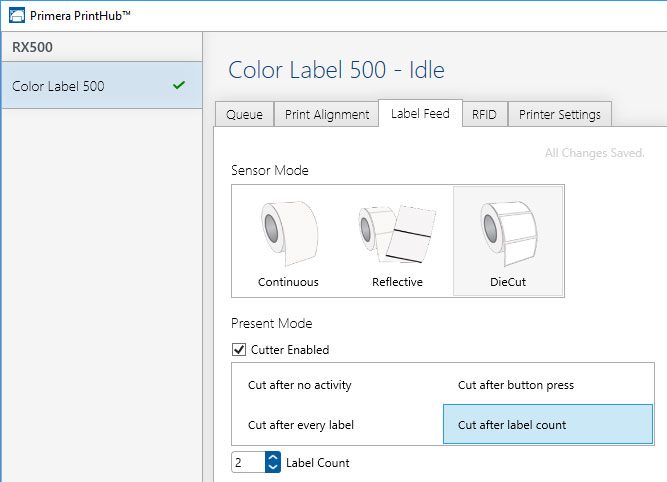
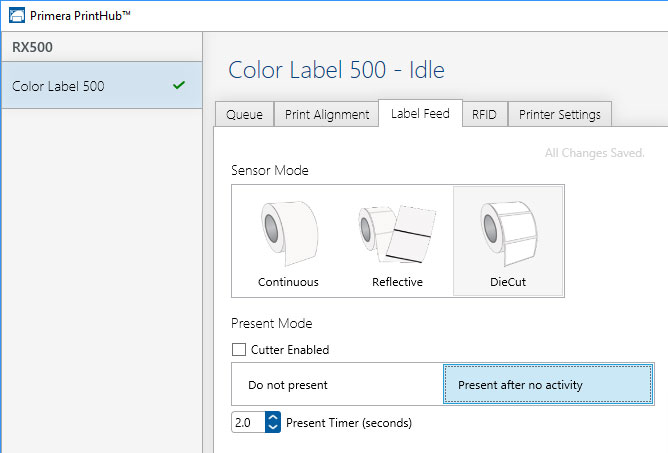
- Click on the Label Feed Tab.
- Click on the Output/Cut Mode button. There are different options available which change if the Cutter is enabled or disabled. If the Cutter is disabled, the label present options will be available. If the Cutter is enabled the present options are no longer available but cut options become available.
Cutter Options
Cut after button press. This setting will cut after you press the Load/Feed button on the printer. This can be used after one label or an entire job. This feature is useful if you will not be present at the end of the print to catch the cut label.
Cut after label count. This option will cut after the number of labels specified in the toggle box that appears when this option is selected. This is useful if you have front/back labels or sets of labels.
Cut after no activity. This setting will cut at the end of a print job if the printer does not receive another print job within one second of the last print job in the queue. You can use this feature to cut at the end of multi-copy job, multi-page job or multiple individual jobs in the queue.
Cut every label. This setting will cut after every label.
Present Options
Do not present. In this mode the label stock does not move after the last label is printed. This means that part of the last label printed is still in the printer. This should be used only if you have a label rewinder attached.
Present after no activity. This setting will present (feed all printed labels past the front opening) at the end of a print job if the printer does not receive another print job within one second of the last print job in the queue. You can use this feature to present at the end of a multi-copy job, a multipage job or multiple individual jobs in the queue.
Present Timer. (Works only with Present after no activity option) Set the time delay from the end of the job to when the label is presented. Increasing this value can resolve issues with unnecessary present actions between jobs.