3E. ADVANCED PRINTER DRIVER FUNCTIONS (PC)
Once the Publisher software has been successfully installed, you will want to take a moment to familiarize yourself with the printer driver settings for your Publisher. These settings affect the print quality of your discs. The default settings of the Publisher printer driver will fit most printing needs. Please refer to the following steps to change or verify your printer driver options:
Click the Windows button and choose or search for Devices and Printers.
Click on the Disc Publisher SE-3 icon with the right mouse button and select Printing Preferences.

NOTE: The PTPublisher application allows you to adjust some of these settings directly through the Add a Print file screen in that application. In PTPublisher you also have the option to Use Driver Defaults. If this is selected the software will use all of the settings set via the methods described in this section.
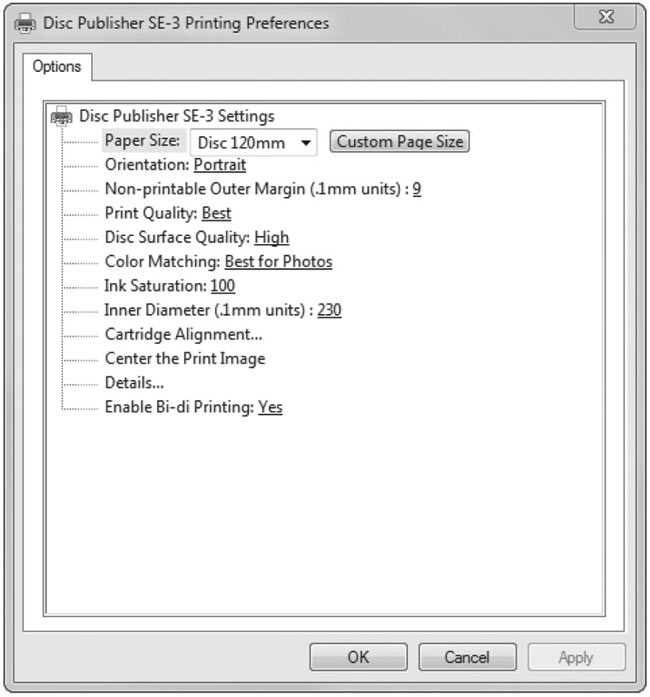
Paper Size
The paper size option will be set to Disc 120mm for printing onto printable surface CDs and DVDs.
Non-printable Outer Margin
Adjust this value to print all the way to the outer edge of a CD. This is useful if you are printing full coverage images. The lower you set this value the farther to the outer edge of the CD you will print. Please note that with most media the printable surface does not extend all the way to the edge of the disc.
Print Quality
This setting has the most dramatic effect on the quality, speed and ink usage of the print. Color matching also affects print quality. Start with the default setting for fastest printing and the least amount of ink consumption. If the quality needs improvement move to the next highest setting.
Disc Surface Quality
This setting is a finer adjustment to each of the "Print Quality" settings in the previous paragraph.
Color Matching
Best for Graphics mode is best used for graphical images where accurate color reproduction is not as essential. Images printed in this mode will look more vibrant because more ink is being used to produce them. However, printing images of people may produce skin tones that have a reddish tint.
Best for Photos mode is best used for photographic images where accurate color reproduction is very essential. Images printed in this mode will look lighter than those printed in Graphics mode. Skin tones especially will look more natural in this mode.
NOTE: Exact color matching of the printed discs to the screen may never be possible since there are factors that affect this out of the driver's control. The surface of the disc reacts with the ink in the cartridge to produce the color. For this reason, when printing the same image to different types of discs with different surfaces the printed output can look entirely different.
Ink Saturation
This option controls the ink saturation of the printed image. When printing onto the printer manufacturer's TuffCoat CD media, this option can be left at its default setting of 100%. When printing onto other brands of printable CD media, you may need to adjust this control in order to optimize the ink saturation for the printable surface of your specific CD media. If discs do not seem to be drying completely it may be necessary to reduce this value.
Inner Diameter
This value changes the size of the non-printed center. Larger numbers cause the non-printed center to be larger and smaller numbers make the non-printed center smaller. This number is incremented by 0.1mm so a change of 10 for inner diameter changes the diameter by 1mm.
Inner Diameter Non-Printed Diameter
230 22.0mm (0.905") (TuffCoatTM, Default)
150 15mm (0.591") (This is the size of the hole in the center of the disc. Inner diameter cannot be adjusted lower than this.)
Cartridge Alignment
The Cartridge Alignment prints a test print and then automatically scans the print to configure your printer for bidirectional printing and to align the color cartridge. It is important to perform this calibration every time you change a cartridge. If you forget to perform this calibration you will be prompted to do so before your first print from the new cartridge.
Center The Print Image
NOTE: Your printer comes from the factory pre-calibrated to print the image in the center of the CD. You can use this adjustment if you need to fine-tune this location.
- Verify that a disc and a color ink cartridge are installed in the Publisher. It is important to use the same disc you normally use for your publishing because different brands of discs may vary slightly in size. Also, verify that the Publisher is powered ON and that it is connected to your computer.
- Click on Center the Print Image and then click the Properties button. The printer will begin printing the calibration test print.
- When the print is complete, rotate the disc 180º and put the disc back in the input bin and repeat step 2 using the same disc.
- When the second run of the print is complete, you should have a test print that looks similar to the following:
- Along the vertical axis of the printed disc, find the number whose lines touch. For example, in the above illustration, enter the number 2 into the Vertical box of the Calibration window and 0 for the Horizontal axis.
- Select the OK button. Your images should now be centered when printed on a disc.
After your selections have been made, close out of the printer setup window. You are now ready to go to an application program and print. All printer driver selections will stay the same until you change them.
If you ever wish to verify your factory-calibrated Vertical and Horizontal calibration settings, you can run a simple calibration procedure to assure that your images will be centered when printed on a CD. To do this, refer to the following steps:
*BACK
1NOTE: After printing this image
once, rotate this CD
so the ARROWS point
to the BACK of the printer
and print again.
2Vertical CalibrationFind and enter the numberwhose lines touch(must be the SAME number)
3Horizontal CalibrationFind and enter the numberwhose lines touch(must be the SAME number)

Details
Select this button to display the current ink levels as well as options for cleaning and changing cartridge.
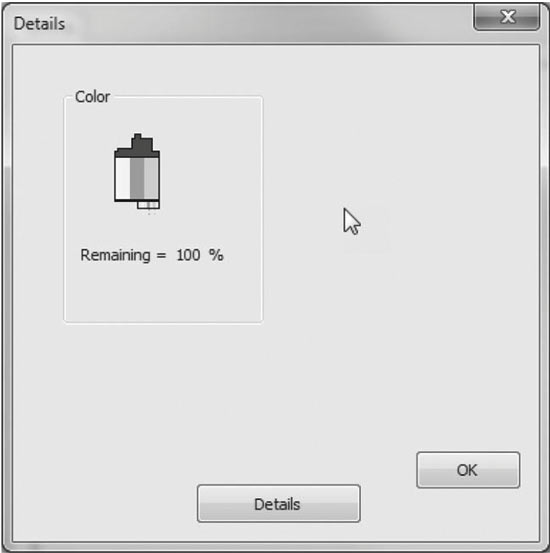
Select the Details button for information on the drivers, firmware, alignment and number of discs printed with your Publisher. Click Reset Factory Default to set all print centering and cartridge alignment settings back to factory defaults.
Enable Bi-di Printing
Set this option to "Yes" for faster printing that requires cartridge alignment. Set it to "No" for slower printing that does not require cartridge alignment.