3.2 Die Cut / Reflective
Die Cut Label Stock
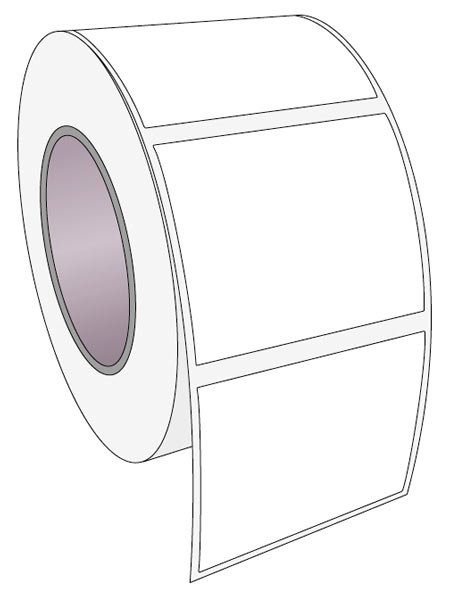
Die Cut (default): If you are using standard die cut labels that look similar to the labels pictured to the right, use this setting regardless of the size of the label. Also use this setting for through-hole label material where a hole is punched through each label or a notch is cut in the side (not common).
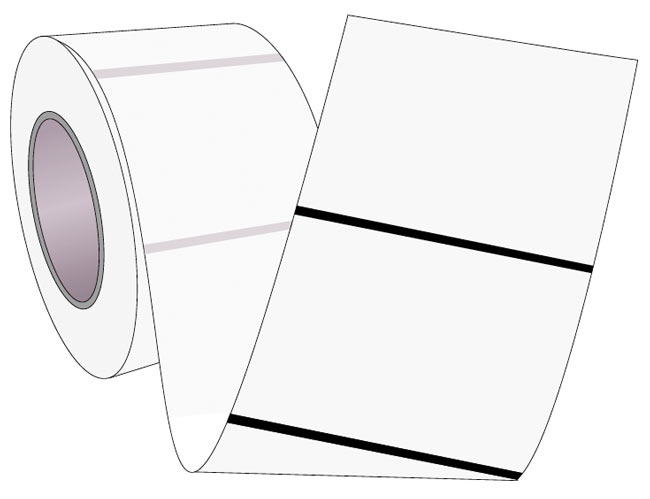
Reflective: Use "Reflective" for label material where a black pre-printed line (black mark) on the back of the label stock indicates the break between labels. Black marks are required on clear label stock or where the label waste matrix is left on the liner. Black marks can also be used for irregular-shaped labels or on any stock where the print starting position cannot be sensed using the label itself.
3.3 Application Roller Position
r-1: The default Application Roller Position is r-1 which is the position furthest from the peel edge. The r-1 position is the most forgiving for container surfaces that are not completely flat. It also works with the widest variety of container heights.
r-2: The r-2 position should be used if you are using a shorter label that does not reach the Application Roller before falling off the liner. The label should always extend underneath the Application Roller so that the roller will press the leading edge of the label to the container when the arm is lowered.
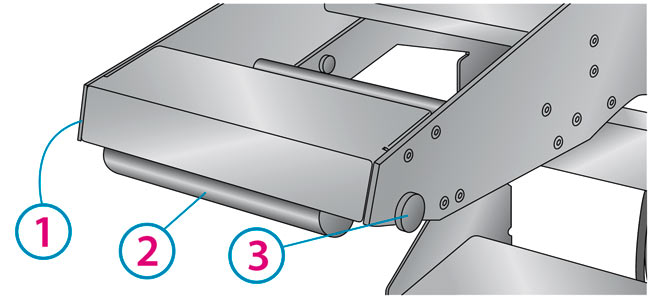
To adjust the physical position of the Application Roller, remove the thumb screws on either side of the Application Arm. Push or pull the roller to align the thumb screw holes with the desired holes in the side plates. (The r-1 holes are closer to the front of the unit than the r-2 holes.) Replace the thumb screws.
Note: Make sure the physical position of the Application Roller always matches the setting selected.
3.4 Sensor Calibration
1Thumb Screw
2Application Roller
3Thumb Screw
The Label Sensor must be calibrated to the specific label stock being used for each memory location. Use the following procedure to calibrate the applicator for your specific label stock/liner material:
- Load the label stock as described in Section 2. Be sure to remove labels from the liner back to the Liner Drive Roller. For reflective stock, the black mark should be positioned directly under the Label Guide Roller. The goal is to feed only clean liner through the sensor area. This will give the sensor a good reading of the liner material.
- Once the liner is loaded, follow the steps above to navigate to the SC- setting in the Setup Mode.
- Lower the arm to trigger the calibration.
- The label stock will move forward until the first label is presented for application.
- Calibration for this liner is now complete and the values are stored in the current memory location.
Note: It is not necessary to recalibrate the label sensor between rolls of the same label stock.
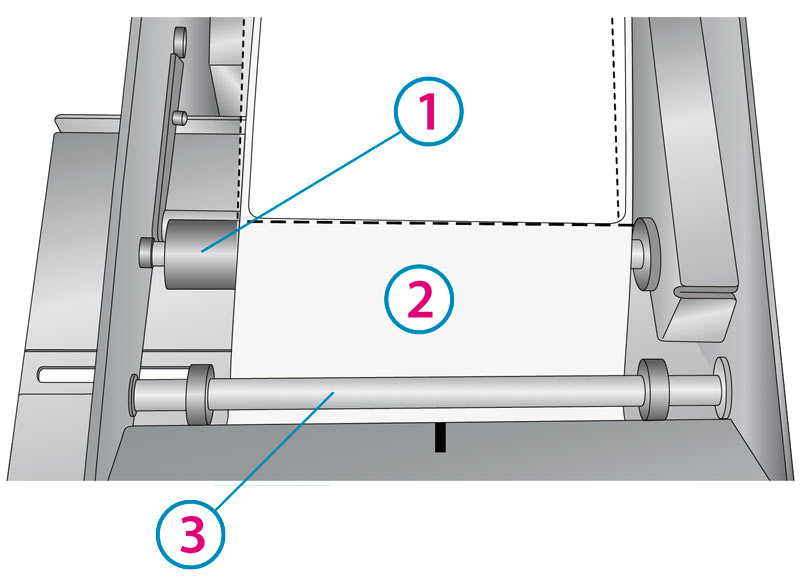
1Liner Drive Roller
2Remove labels from liner to this point.
3For reflective stock, the black markeflective stock, the black mark should be positioned dirshould be positioned directly under thisectly under this guide rguide rolleroller..