Section 2: Loading Label Stock
2.1 Loading Label Stock
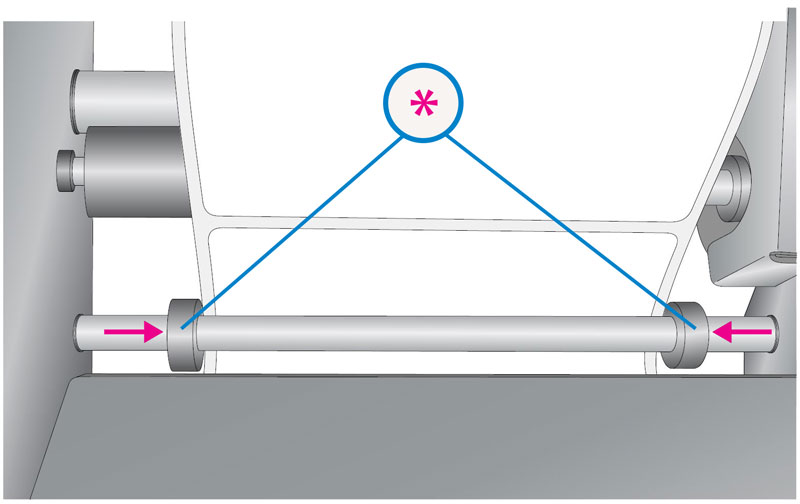
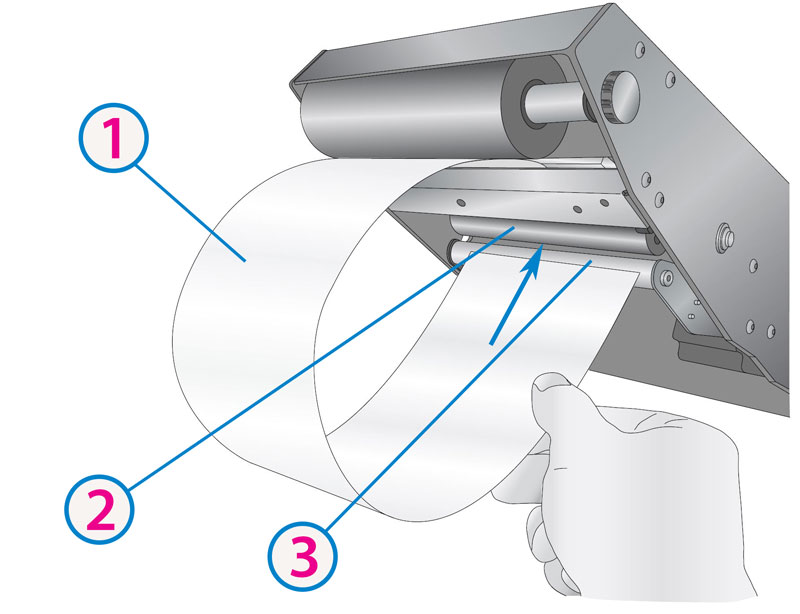
- Remove the Roll Bar and Roll Guides from the Label Applicator. The Roll Guides and Roll Drag Arm are removable and adjustable. They are held in place magnetically.
- Remove one Roll Guide and the Roll Drag Arm from the Roll Bar.
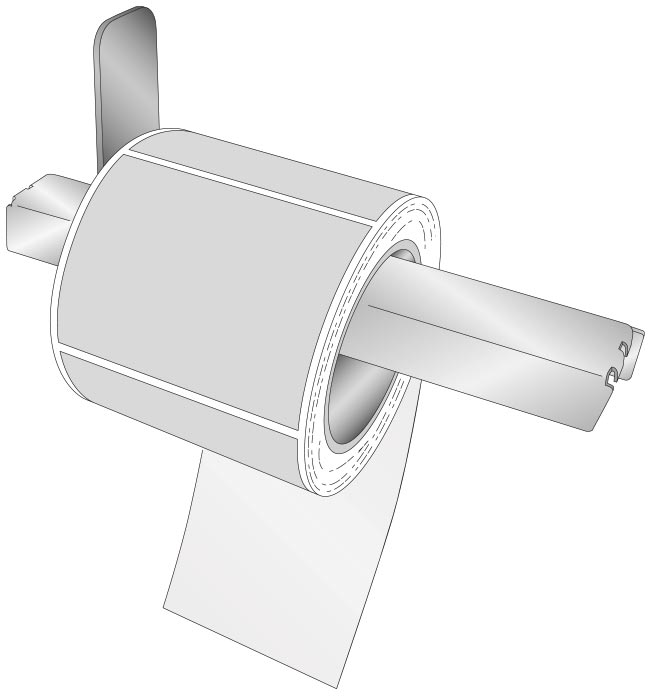
- Place the label stock roll on the Roll Bar with one side against the upright of the remaining Roll Guide.
Place it on the Roll Bar with the loose end of the stock feeding over the top of the roll (labels facing up).
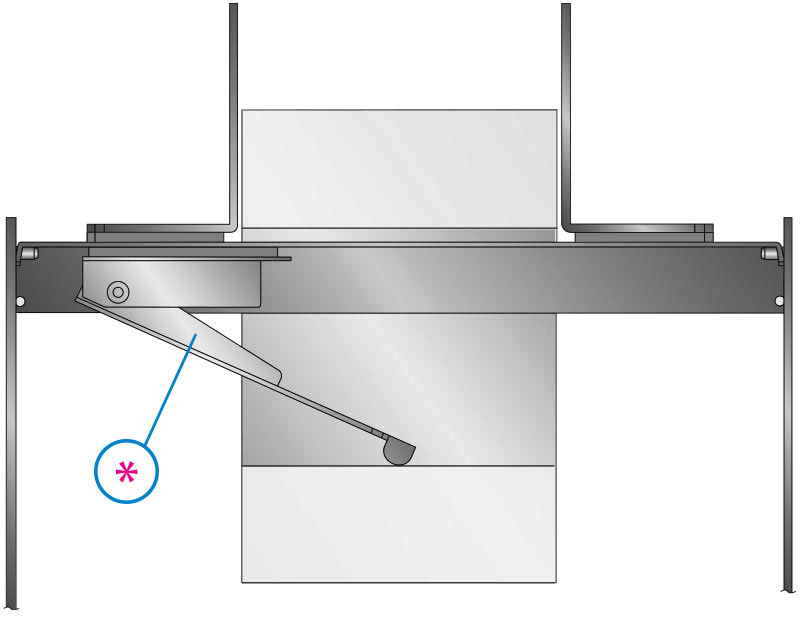
The Roll Bar should be oriented with the holes to the rear as shown. - Place the Roll Drag Arm under the Roll Bar. The Roll Drag Arm may be placed on either side of the Roll Bar but the rounded tip of the Roll Drag Arm should be located inside the core near the center. The arm is spring loaded so that there is downward pressure on the inside of the roll. This helps prevent problems toward the end of a roll.
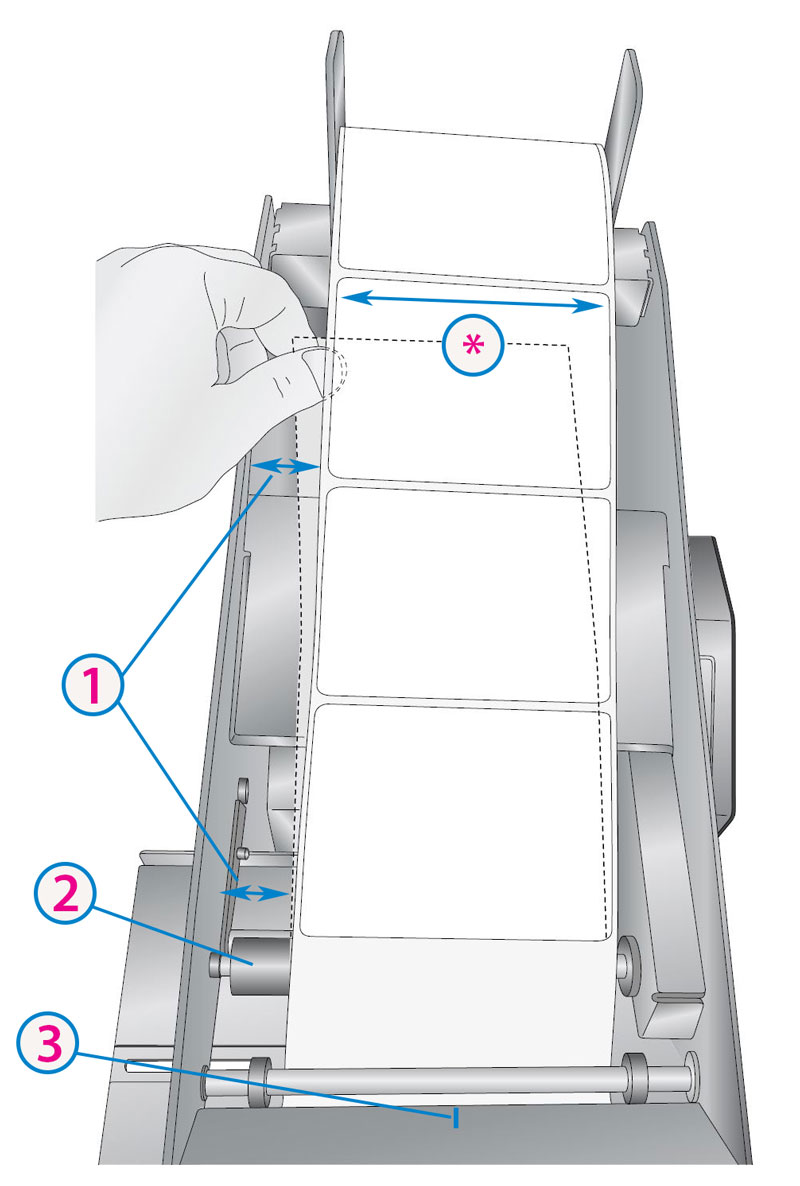
- Place the removed Roll Guide back on the Roll Bar and slide it close to, but not pinching the label stock roll.
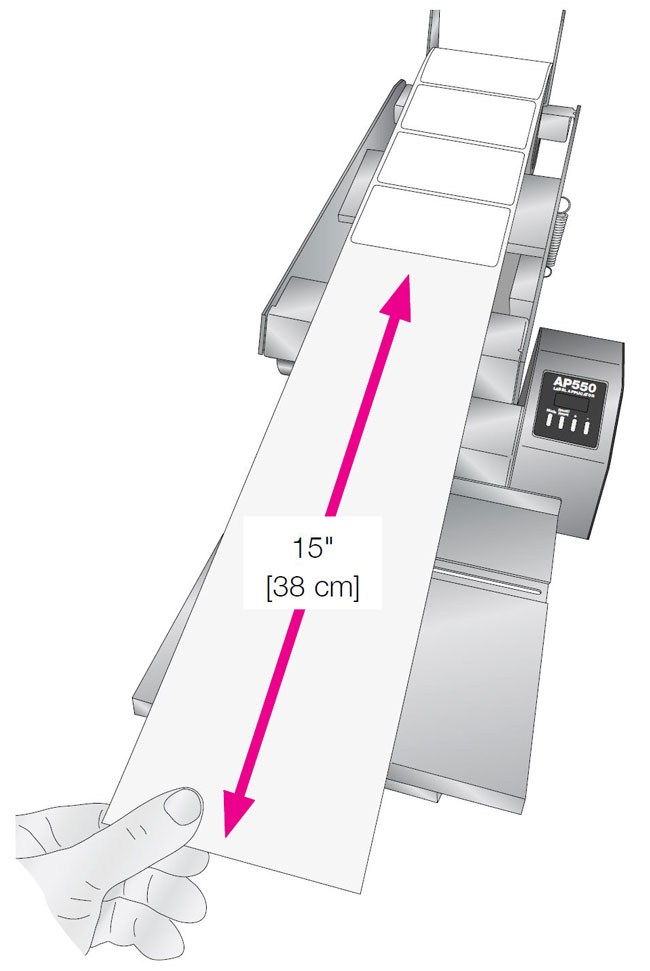
- Pull approximately 12" [30 cm] of label stock out beyond the front of the unit.
- Remove approximately the first 15" [38 cm] of labels from the liner. This will be important later when you calibrate the label sensor to the label stock.
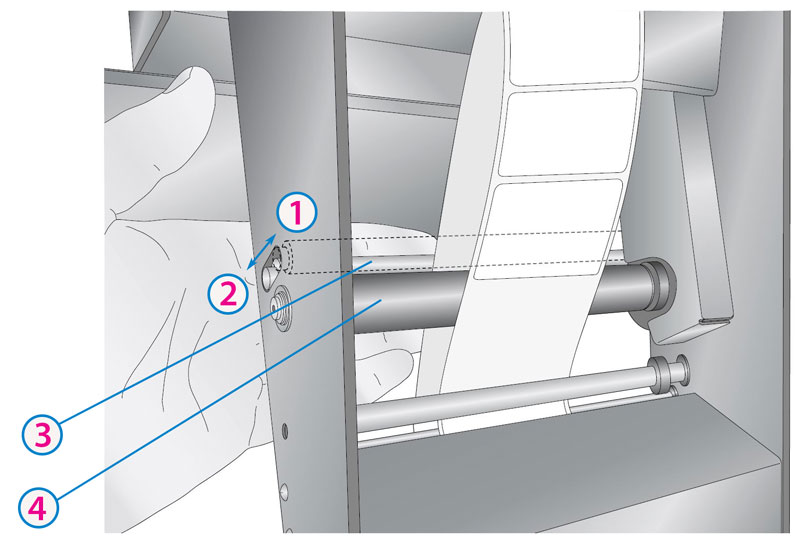
- Push the label stock back until the leading edge of the stock is just before the Label Guide Roller. Push the Guide Collars to the sides so they are out of the label path. These will be adjusted later.
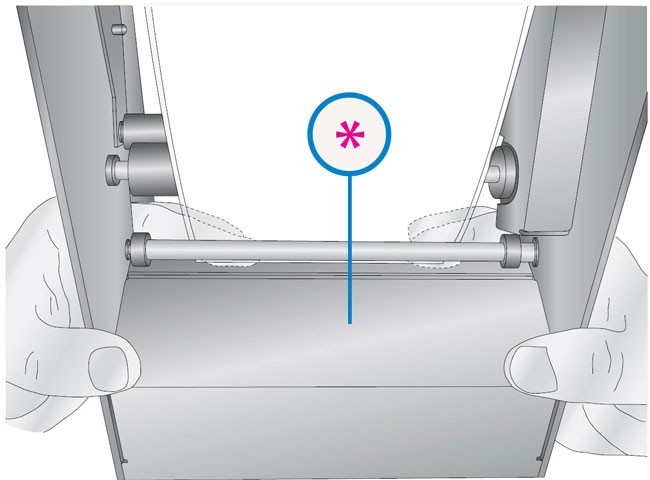
- Use both index (pointer) fingers to roll the leading edge of the label stock UNDER the Label Guide
- Continue feeding the stock in the same manner until it protrudes from the front of the unit. Pull the remaining slack through the applicator.
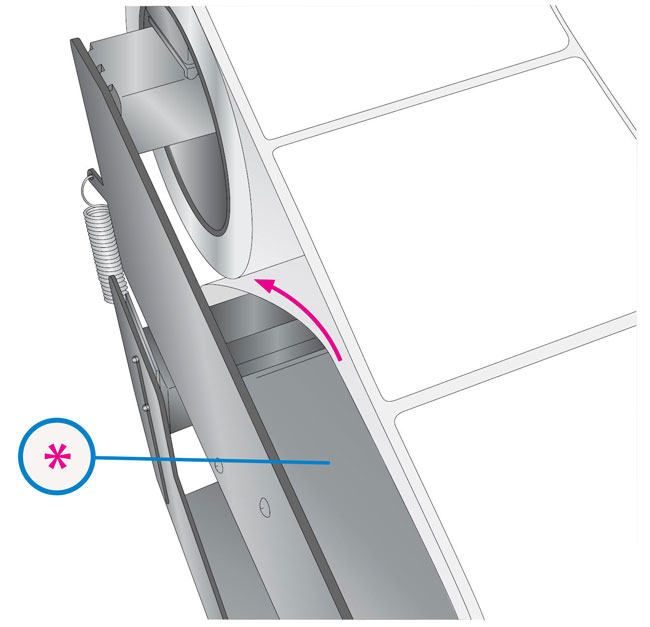
- Feed the leading edge of the label stock between the Liner Drive and Idler Rollers.
- Feed the leading edge of the label stock under the stock coming off the roll. Align the leading edge of the label stock so that it is directly under the stock coming off the roll. Pull it tight.
- Once the upper and lower label paths are aligned, press up on the middle of the Liner
- Feed any remaining label stock over the Motor Cover, under the label roll and out the back of the applicator.
- Move the Guide Collars so they are close to, but not pinching the label stock.
1Roll Guides
2Roll Bar
3Roll Drag Arm
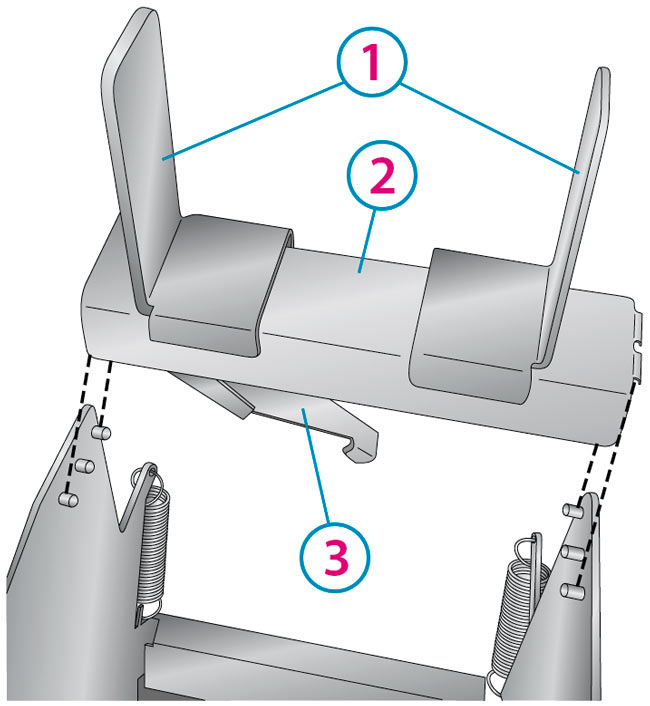
Tip! or narrow label rolls you may need to reverse the Roll Guides to allow the uprights to be placed next to the roll. (The bottom of the guides will face away from the roll on each side.)
*Roll Guides
Tip! Roll Guide Uprights must not pinch the label stock roll. (The label stock roll must have free-play between the guides.)
For additional instruction, see the diagram in Appendix A of this manual or the label attached to the left side of the applicator.
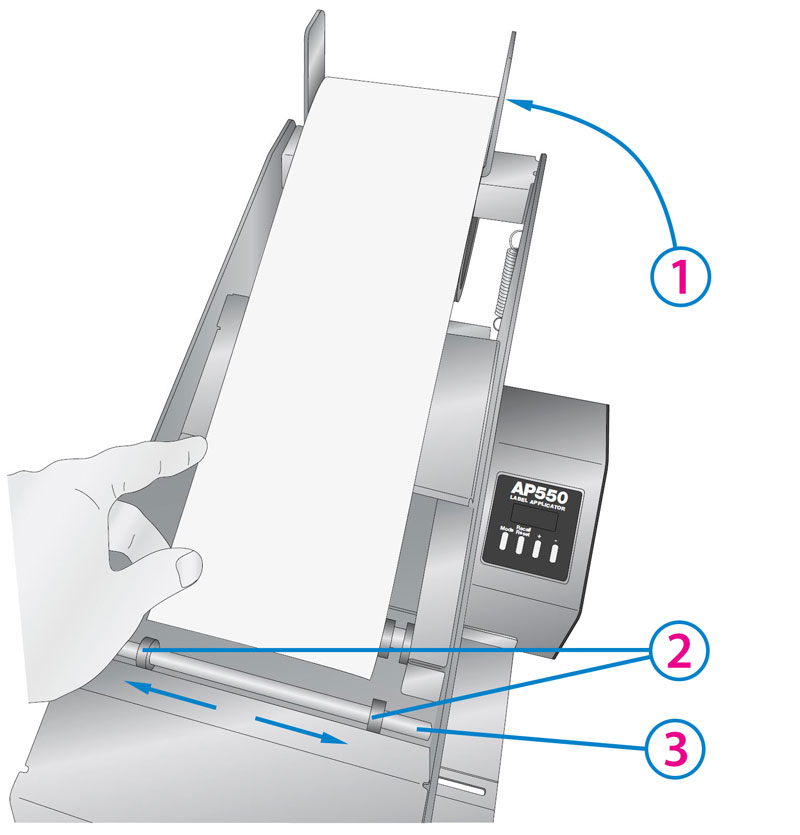
1slack loop behind
2Move Guide Collars to the sides.
3Label Guide Roller
Roller. Feed the stock forward until it enters the Sensor Housing.
Important Note: Do not feed the label stock into upper slot!
*Label Guide Roller
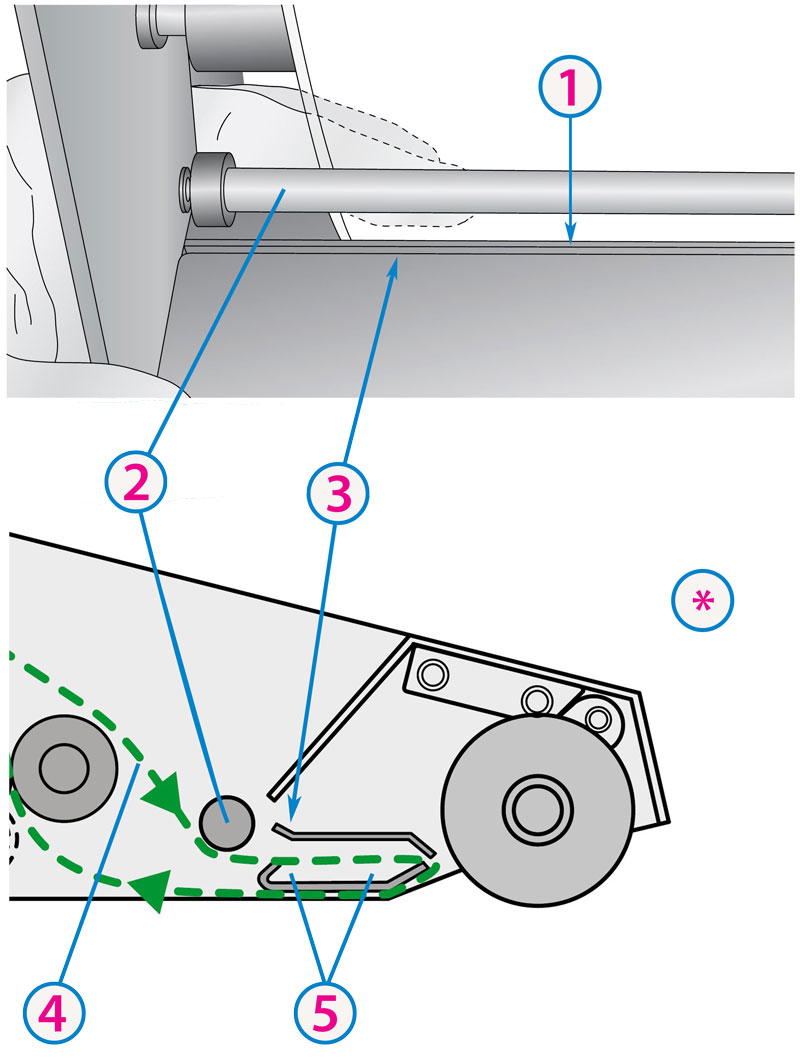
1Feed under this plate.
2Label Guide Roller
3Do NOT feed here!
4Label Path
5Sensor Housing
*Side View
1Pull remaining slack through.
2Liner Drive Roller
3Liner Idler Roller
Note: Make sure the stock is aligned so the labels pass under the line marked on the push bar. The line represents the location of the label sensor. Also, if the label stock has not been used before, make sure the first label does not extend beyond the Liner Drive Roller, as shown.
*Align Here
1Distance from label stock to arm side plate should be equal in these locations.
2Liner Drive Roller
3Sensor Location Line
Idler Roller firmly to lock the label stock in place. You will hear a "snap" when it locks into place.
1Lock
2Unlock
3Liner Idler Roller
4Liner Drive Roller
Important! As you apply the first few labels and more liner becomes available, make sure to route the excess liner off the table and toward the floor. The weight of the liner hanging to the floor will prevent the liner from bunching up and causing problems.
*Motor Cover
*Guide Collars