3B.4. Backup Project. (PC Disc Publishers Only)
To create a new backup project you must setup a data project and then schedule it. Follow these steps:
- Choose Data Project from the project starter window.
- Add the files or folders that you would like to backup. Typically there will be more data to back up than will fit on any one CD, DVD etc. If that happens you will receive a warning message and the data bar at the bottom of the screen will turn red.
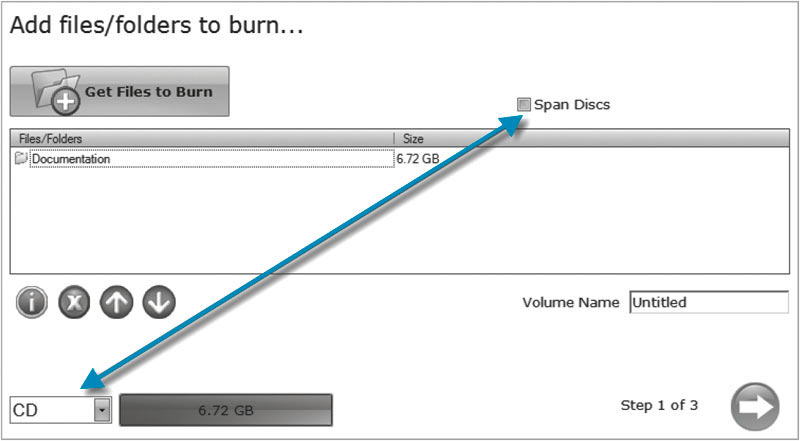
To resolve this issue you may choose to span the data over several CDs or DVDs or change the media to a different type with more data capacity.

If you choose to check the span disc box you do not need to change media type. A Span Report button will appear which will tell you how the data will be distributed over the chosen media type.
Regardless of the media type selected for back up projects it is recommended that span discs be checked to accommodate future backups of the same files/folders which may be larger.
Important Note: It is not possible to span a single large file over multiple discs.
Using the media drop down list, you may also choose to change the media type to one with more capacity. The data bar will change from red to green.
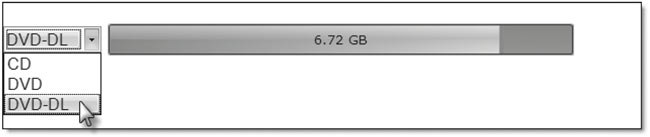 Note: Changing the media type only changes the media that the software expects. It is up to the user to make sure the selected media is actually in the bin.
- Once you have selected the data click the next arrow to add a print file. There is a print template that has been designed for backup projects. It is recommended that this template be used. Check the "Use Print Template" box.
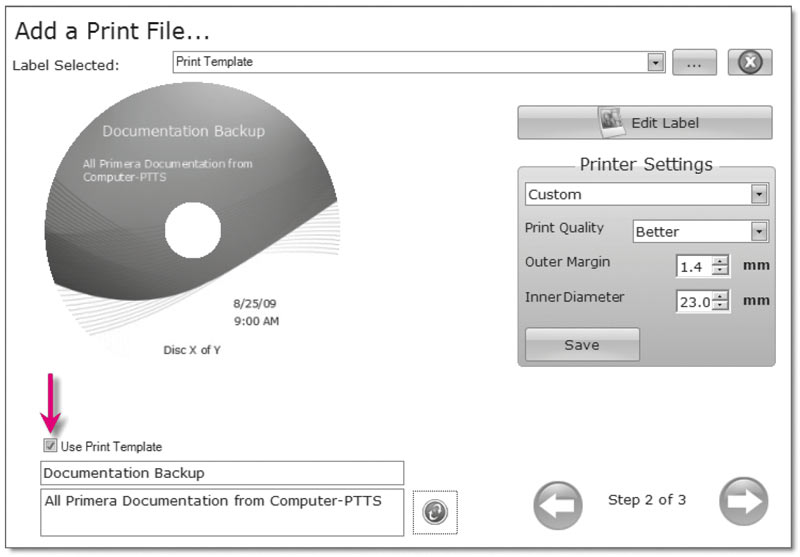 Title and description fields will appear below it. Fill out these fields with information pertaining to the backup project. Date, time and the number of discs in the backup set will automatically be printed on the disc. Click the refresh button to view your changes in the preview.
- Click the next button to display a summary of the project. Click Schedule Project to convert this data project into a backup project. You will be prompted to save your project. Do not move projects once you have saved them. Always choose only one copy even if your project will be spanned across multiple discs.

Once the project has been saved the Schedule window will appear. Set the frequency of the backup and the time of day. Click Schedule.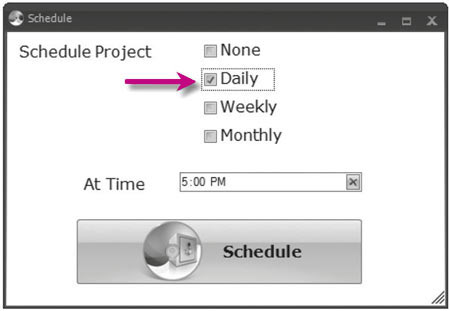
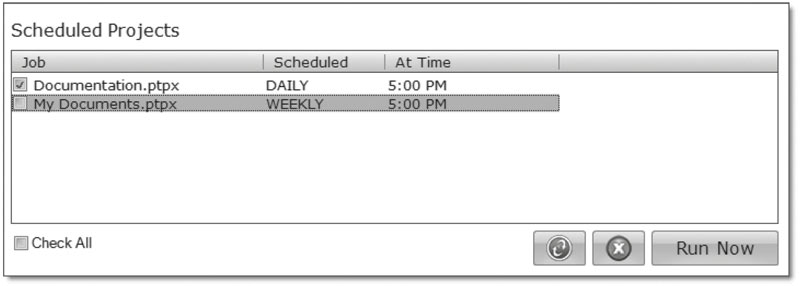
The Scheduled Projects window will appear. Check the box next to the backup project you would like to run. Click Run Now to run it for the first time now. Otherwise, the backup project will proceed at the scheduled time.
 You must keep the PTPublisher software open, the Disc Publisher turned on and the discs loaded for the automatic scheduled backup to occur. If you would rather not do this you may also check None on the Schedule window to run the backup project when you choose. This will add the backup project to the Scheduled Projects list and allow you to run it whenever you click the Run Now button.
You can access the Scheduled Projects list at any time by choosing Advanced Project from the project starter window. Choose Backup Project from the sub menu. Here you can view all scheduled projects, edit the project or change the frequency or time of the automatic backup.
Note: All backup runs are full backups. PTPublisher does not do incremental or differential backups by searching for new or changed data.