1D. IDENTIFYING THE PARTS
Front Panel and Top
1Power/Ink Button
2CD/DVD Recorder Drive
3Recorder Tray Button
4Extendable Output Bin
5Input Bin
6Robotic Arm
7Ink Cartridge Carrier
8Cover
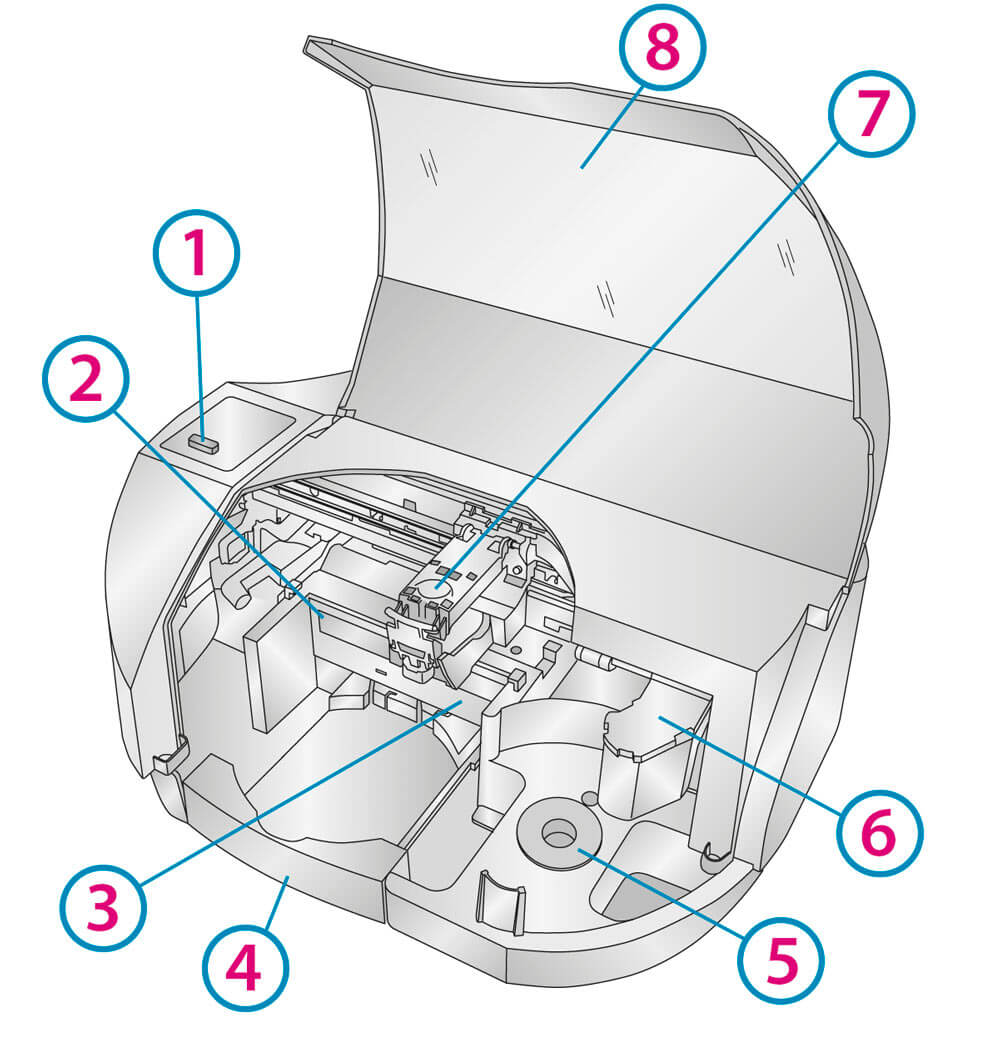
This illustration shows the Publisher and its components.
The Robotic Arm moves discs from the Input Bin, to a CD/DVD Recorder, to the printer, and finally to the Output Bin.
The CD/DVD Recorder is automatically loaded and unloaded by the Publisher's Robotic Arm.
The Recorder Tray Button manually opens or closes the Recorder Tray. In normal operation, the in/out movement of the Recorder Tray is controlled automatically and this button is not used.
With the cover closed, the Power/Ink Button turns the Publisher's power OFF if pressed and held for five seconds. Press it quickly to turn power back on. When already powered on quickly pressing the power button will open and close the printer tray.
When the front cover is open, the Power/Ink Button is used to position the Cartridge Carrier for easy ink cartridge replacement.
The
The Output bin is located in front of the recorder drive. You can access the output bin by opening the front cover or by pulling the bin out. The bin can be ejected at any time while the Publisher is operating. It is recommended that you close the drawer for multiple disc projects. Leave the drawer open only for single disc dispensing.
The Front Cover is a durable plastic cover that will protect the Publisher from dust and interference.
The Ink Cartridge Carrier holds the color ink cartridge.
Rear Panel
This illustration shows the input ports found on the rear panel of the Publisher:
The USB 3.0 Port is connected to an open USB 3.0 port on your PC with the USB 3.0 cable, included with your Publisher.
1USB 3.0 Port
2Power Input Port
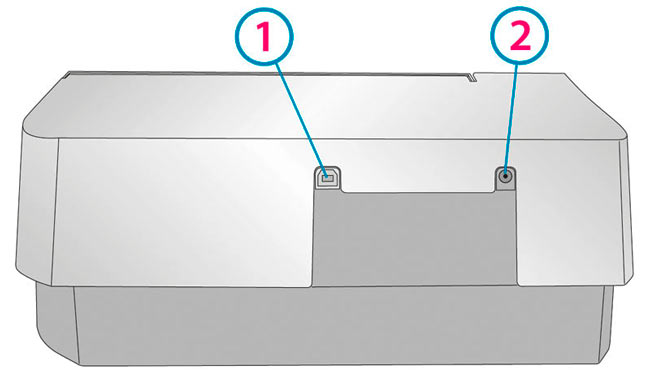
Note: The included USB 3.0 cable can also be connected to USB 2.0 ports on your computer.
The Power Input Port connects to the included power cable. The power supply is a switching 100V~240V power supply.