1F. INSTALLING THE INK CARTRIDGE
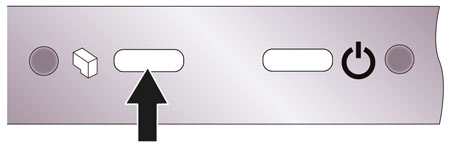
- With the cover open, press the Ink Button (left button) to move the Ink Cartridge Carrier to the load position.
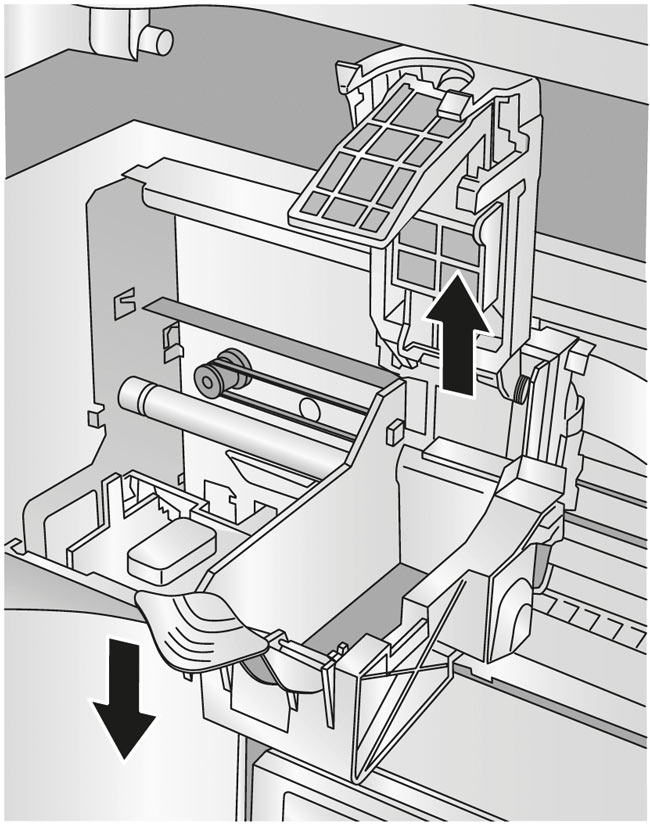
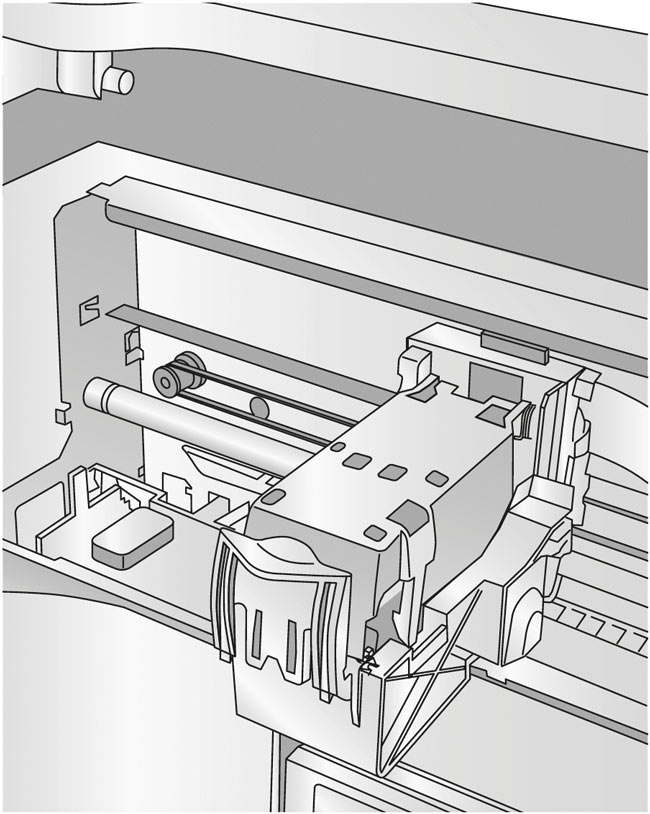
- Open the cartridge cover by pressing down on the tab.
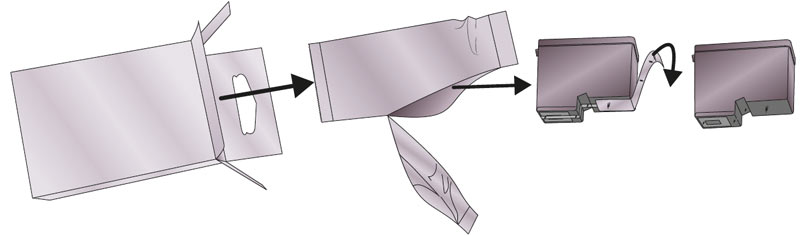
- Remove the ink cartridge from its packaging. Slowly remove the tape covering the cartridge's print head.
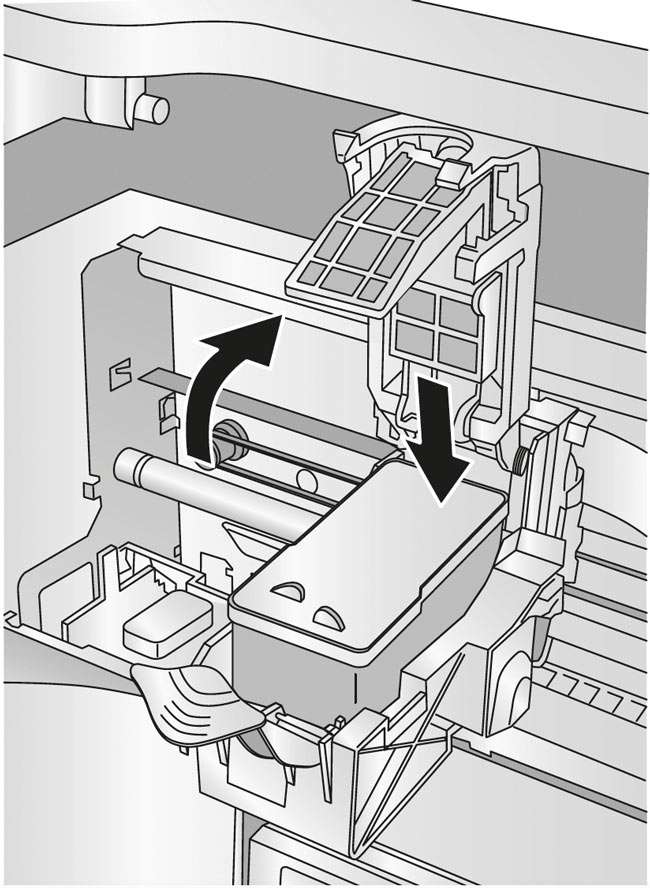
- Insert the ink cartridge into the carrier, copper end first and snap the cartridge cover in place.
- Close the Publisher's front cover.
- You will be prompted to align the cartridge in PTPublisher as soon as the software is opened. Follow the procedures displayed on screen.
Note: An alignment print is required every time you install a new cartridge. The software will always prompt you to align the cartridges. Make sure there is an unprinted disc in the bin for this alignment.
1G. SETUP THE KIOSK BIN
Kiosk Mode allows you to use both of the Publisher's Bins as input, doubling your disc capacity from 50 discs to 100 discs. In this mode, the finished discs will be deposited through the front "reject area" of the Publisher. In Kiosk mode all discs would be ejected in this manner. Rejects can be identified in the stack because they will not be printed. Refer to the following Kiosk Kit installation instructions.
To enable Kiosk Mode, OpenPTPublisher - select Options from the Tools menu - find the Options tab - now check the Kiosk Mode box. On a Mac, Kiosk Mode can be enabled in the Robot Options menu.