2D. CREATING A PRINT LABEL USING SWIFT PUBLISHER (MAC)
The Swift Publisher software is a great tool for creating professional looking dics with a Mac. It is very easy to use. You can import your own designs in many different file formats. On the website www.belightsoft.com you find the
latest Swift Publisher version for download.
To setup and print a disc design please follow these instructions:
- Open the software and select the category “Disc and Media“. Now you can choose between creating your own disc or using one of the CD/DVD templates.
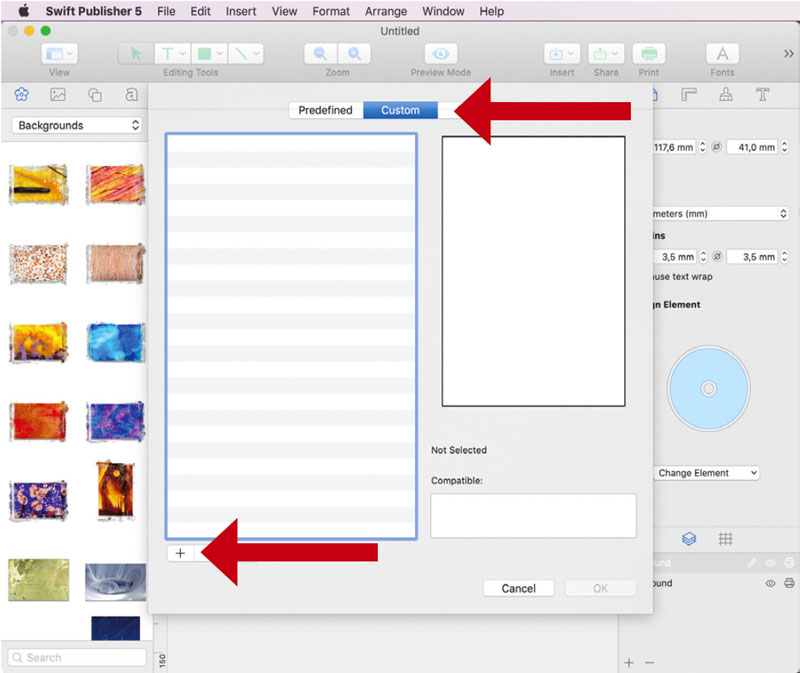
- To design an own layout, open the tab “New Disc“. Now you can choose between different sizes. Alternativly, you can customize your own format.
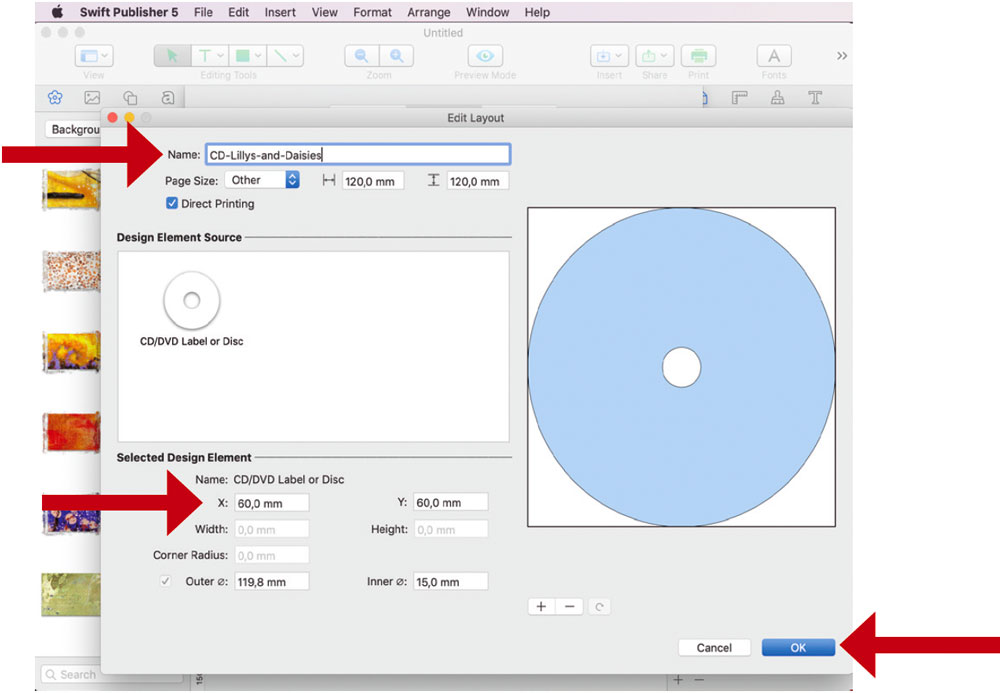
- If you select customizing, you can change the parametres X and Y, as well as the inner and outer radius and the page size. Click “OK“ to save the settings.
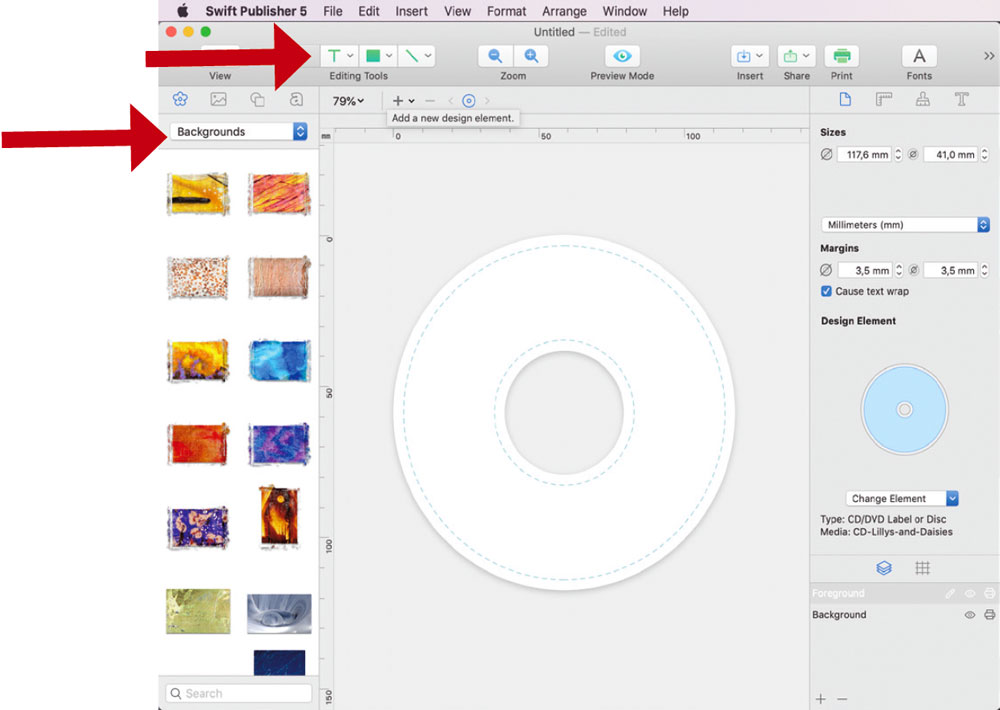
- Now you can start designing. To add a background from Swift Publisher, click on the left menu and select your favourite graphics. Now drag it into your image. You can also add text, forms and other style elements.
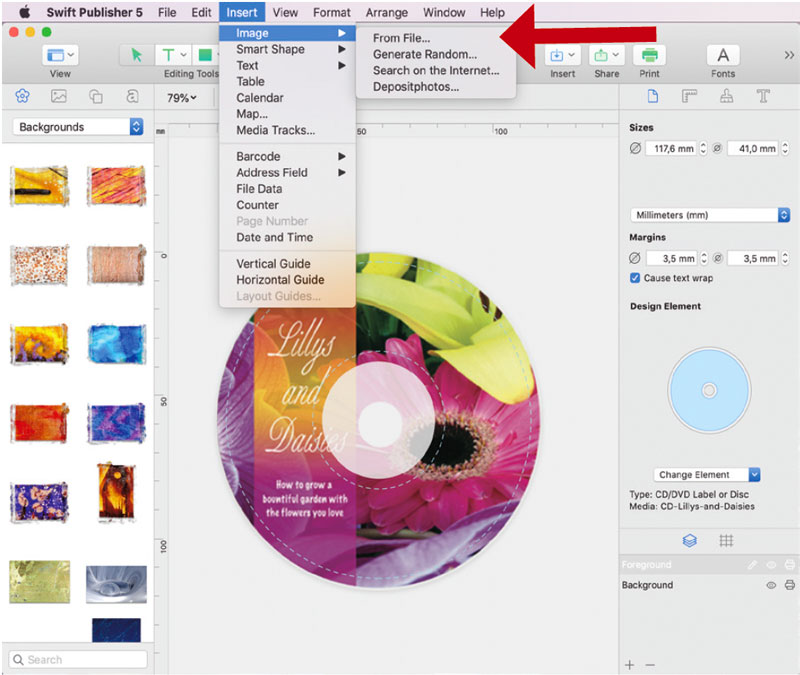
- You can also use your own designs. Therefore, you have to allow SwiftPublisher access to your images. Then you can upload your design and drag it into your image until it fits.
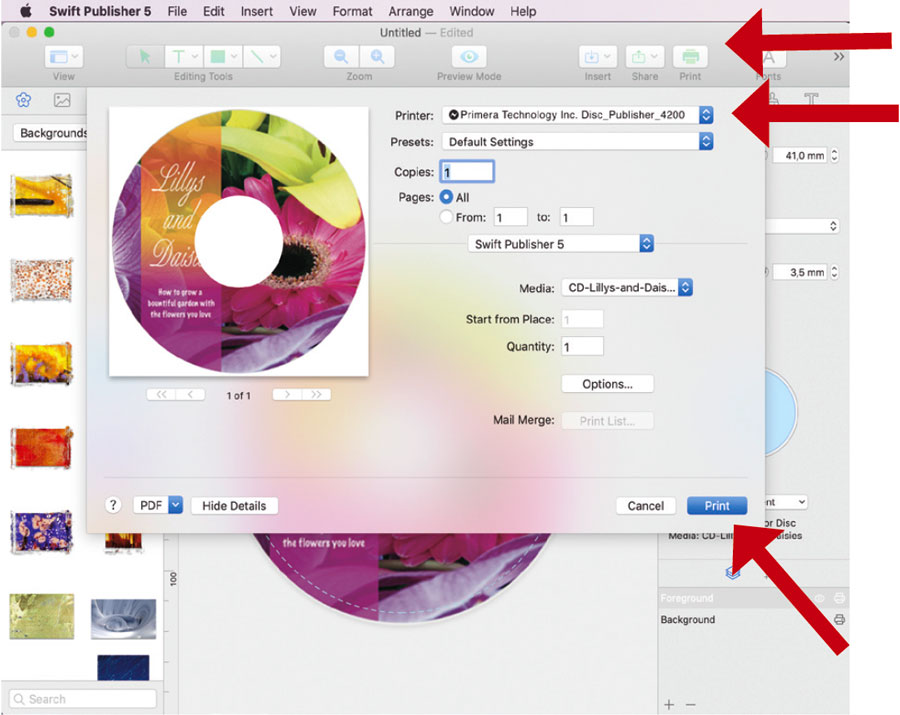
- If everything is setup, click “File - Print“ or the printer symbol on the right. In the next step you select the disc publisher and press “Print“.
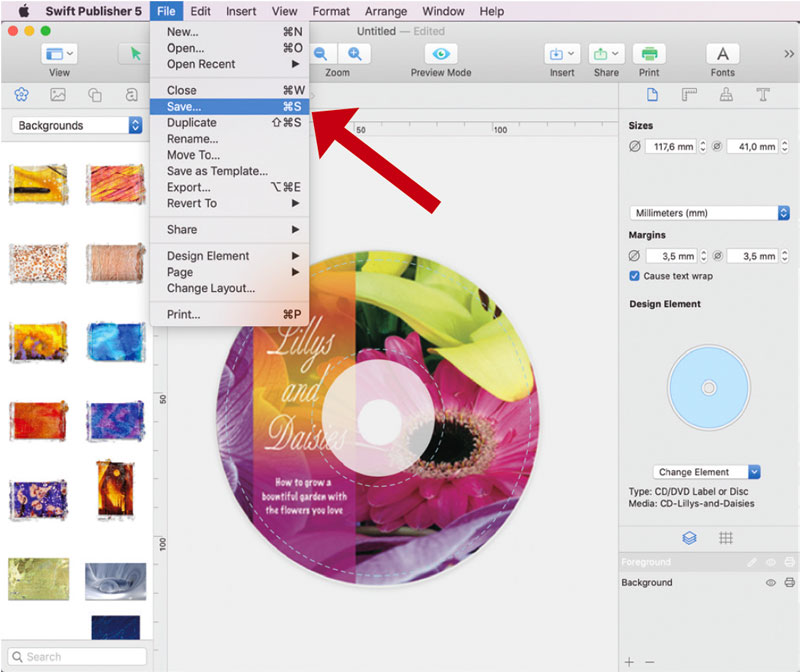
- To save your file, go to “File - Menu“ and click “Save“. Then rename and save it.
- It is also possible to save your design as a template. Therefore click “File - Save as template“ and rename it. You will find it in your Swift Publisher programm under “My templates“ on your Mac.